2. Overview
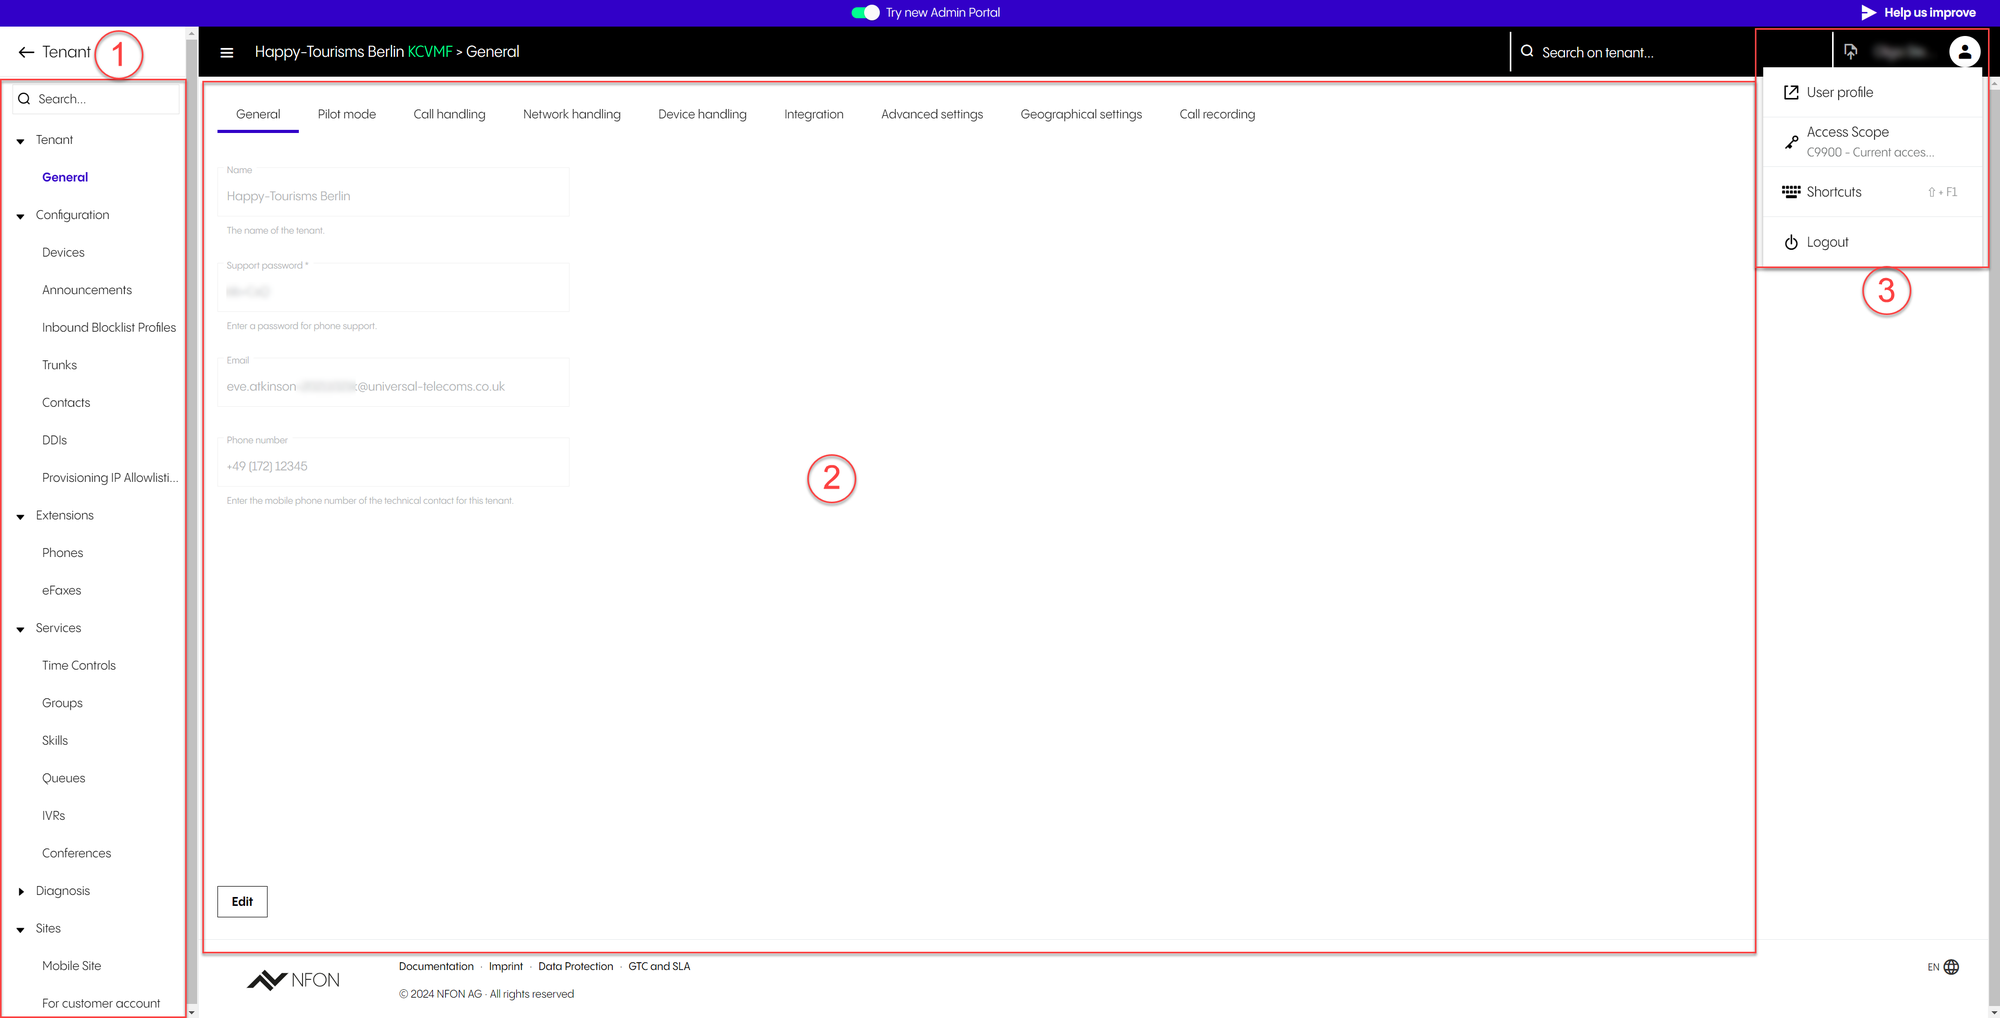
After you have logged in / selected a tenant to edit, you will see the following:
Main menu on the left
Selected setting in the middle (depending on the menu item you have selected in the menu on the lef)
User-specific information (when clicking on your username or icon)
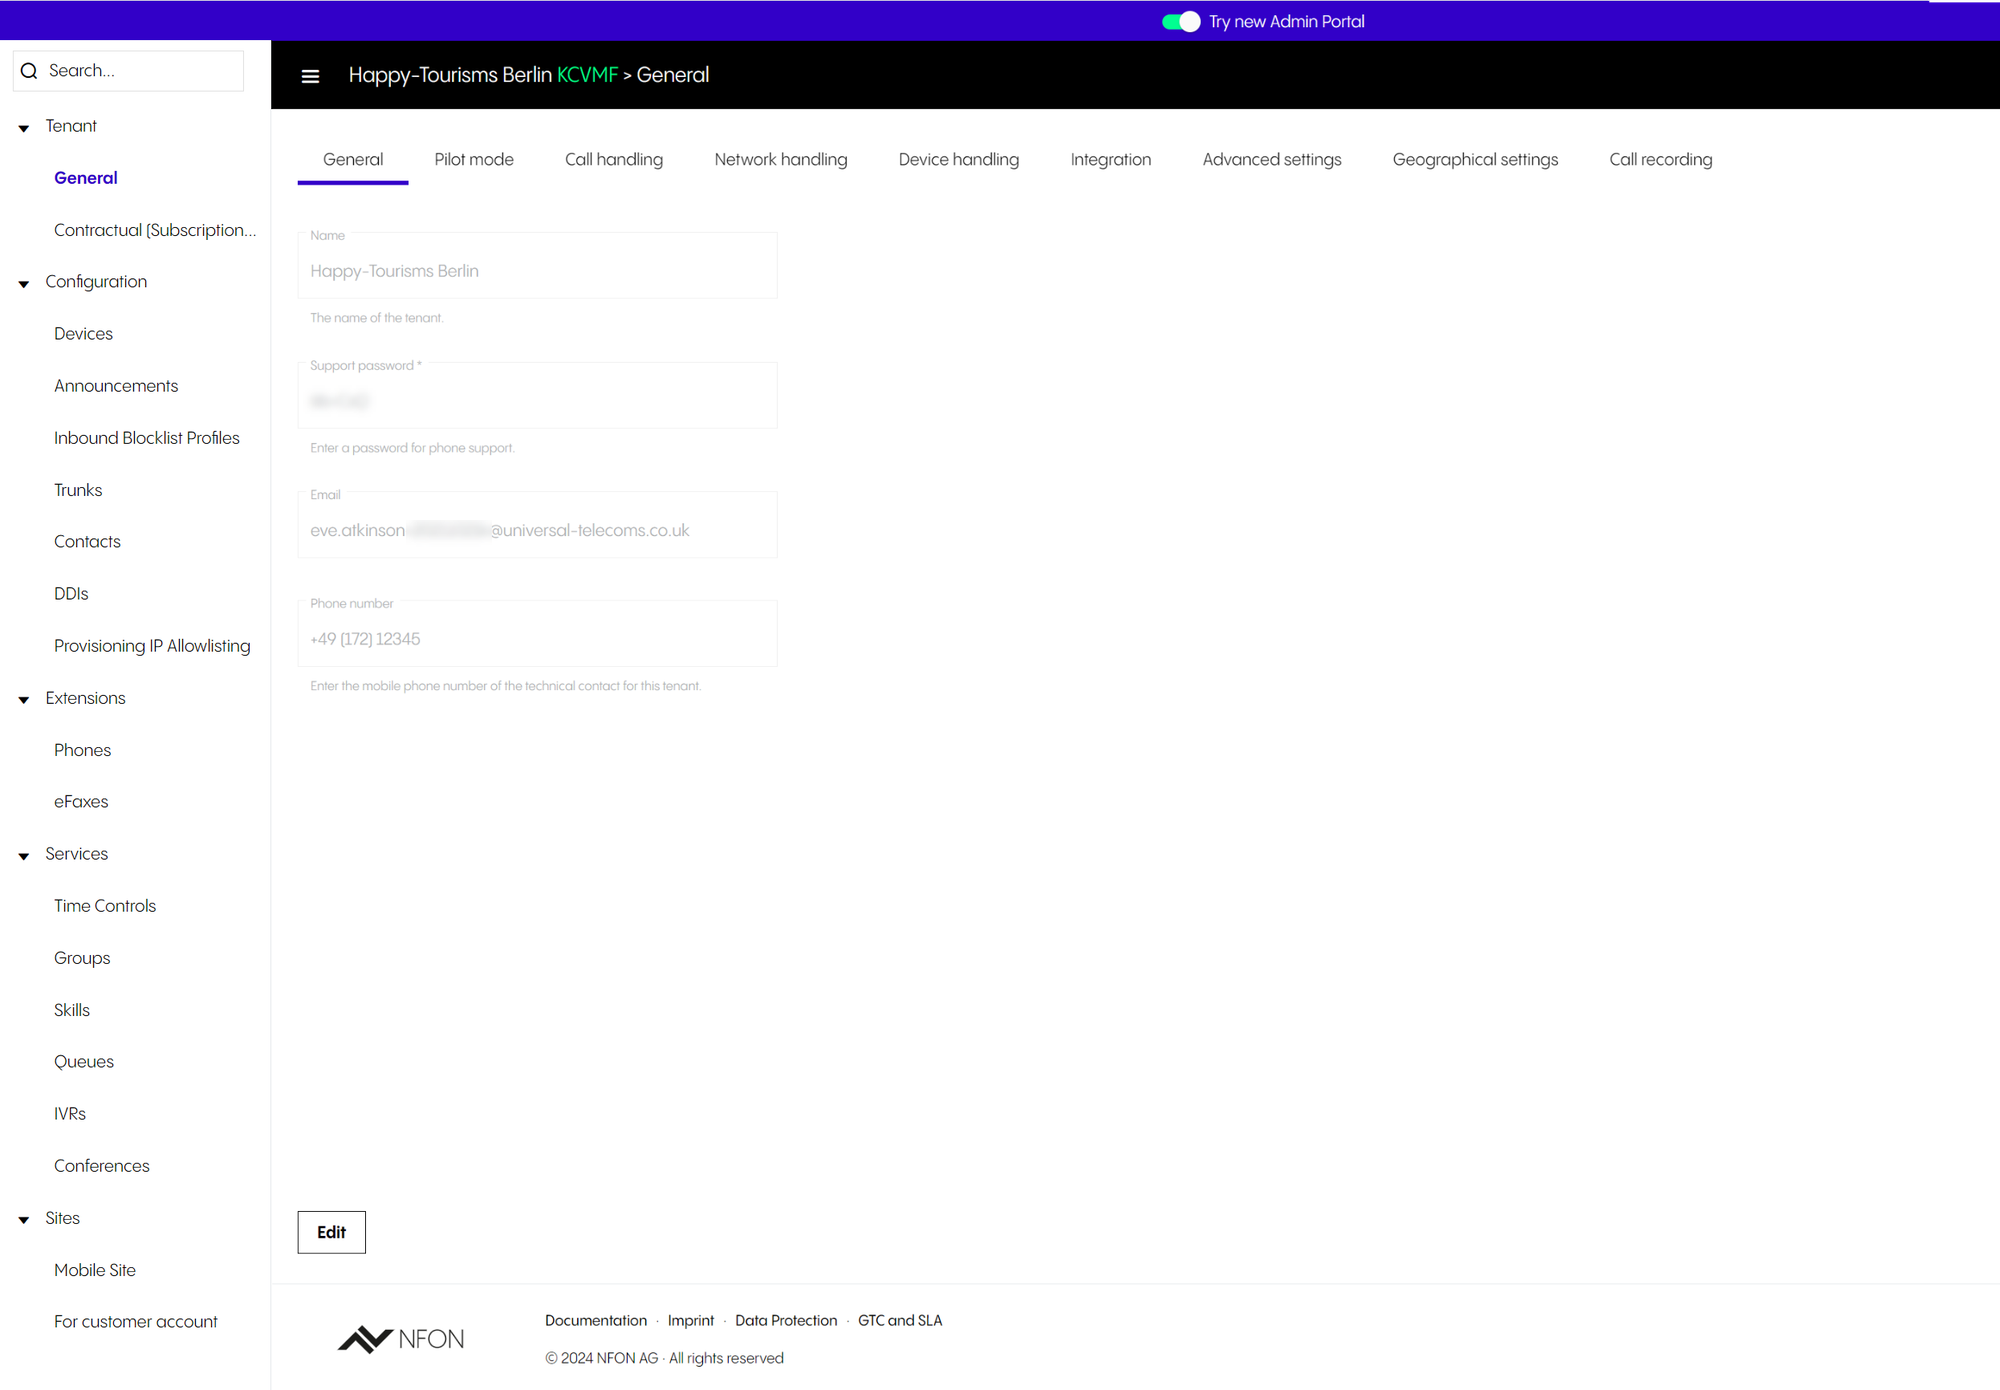
There are 5 sections in the menu on the left (in this example; this may vary depending on your contract, permissions, configuration, etc.):
Tenant (General, Contractual)
Configuration (Devices, Announcements, Inbound Blocklist Profiles, Trunks, Contacts, DDIs and Provisioning IP Allowlisting)
Extensions (Phones and eFaxes)
Services (Time Controls, Groups, Skills, Queues, IVRs and Conferences)
Sites (Mobile and Customer)
You can search in the menu in the search field at the top.
Most menus have similar options. You can:
Add a new entry
Search for an entry
Import or export a CSV file
Select how many entries you want to have on the page
Delete, clone, edit an entry or copy it to a clipboard
When editing an entry, you can:
Click on a stepper or use a scroll bar to quickly navigate to a specific section
Hide/show sections and quicklist
See the quicklist
When editing one or multiple entries, a quicklist opens on the right. You can:
Switch between items
Change the position of the items per drag-and-drop
Close items (please note that by closing an item you will exit the edit mode)
Clicking on your username or avatar, you can:
Access user profile
Open the access scope selection dialogue (if you can access multiple access scopes)
Open shortcuts
Log out