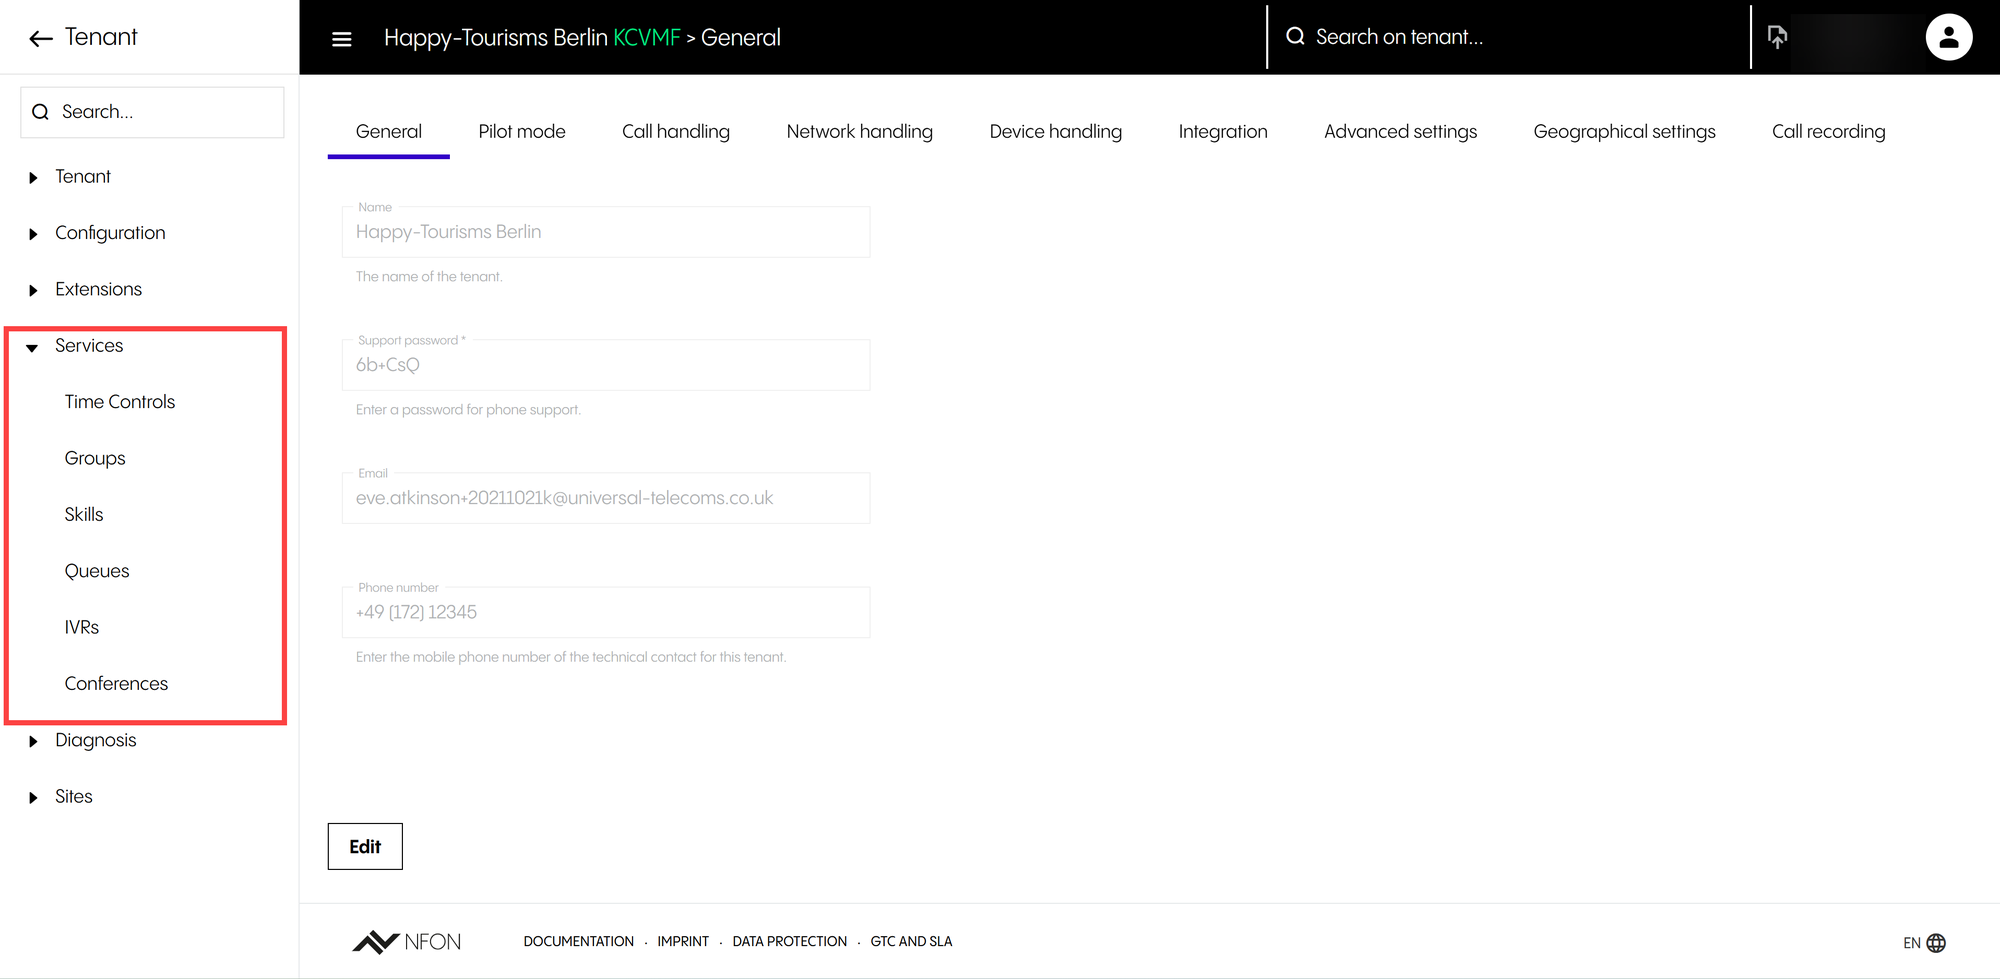
7. Services
Under Services, you will learn about managing the following services:
Conference service
Group service
Queue service
Skill service
IVR service
Time control service
7.1 Conferences
Overview
In this section, you will learn how to configure a conference service.
A conference service is a virtual conference room that allows up to 50 participants to join a conference concurrently. The NFON conference service is based on the meet-me concept: The “room” doesn’t need to be booked, no one has to wait in order to be added to the conference, and the conference stays up even after the last participant has left the room.
In this view, you can:
Add a new entry
Select one, several or all entries and delete them
Edit, clone, or delete an entry, or copy it to a clipboard (you can also edit an entry by double-clicking on it)
Select how many entries you want to have on the page
Search for a conference
TIP
You have the option of cloning a conference if you want to duplicate the conference with the same or similar settings.
Important
Please note that:
It is not currently possible to elevate a participant to become a host. So, if needed, the user will need to hang up and dial in again using the host PIN to join the conference
A conference cannot make outbound calls, only extensions can (phone or eFax)
When a host adds a participant to a conference, they will use their extension to make the outbound call and call charges will be recorded against that user extension.
7.1.1 General
General
Under General, you have the following options:
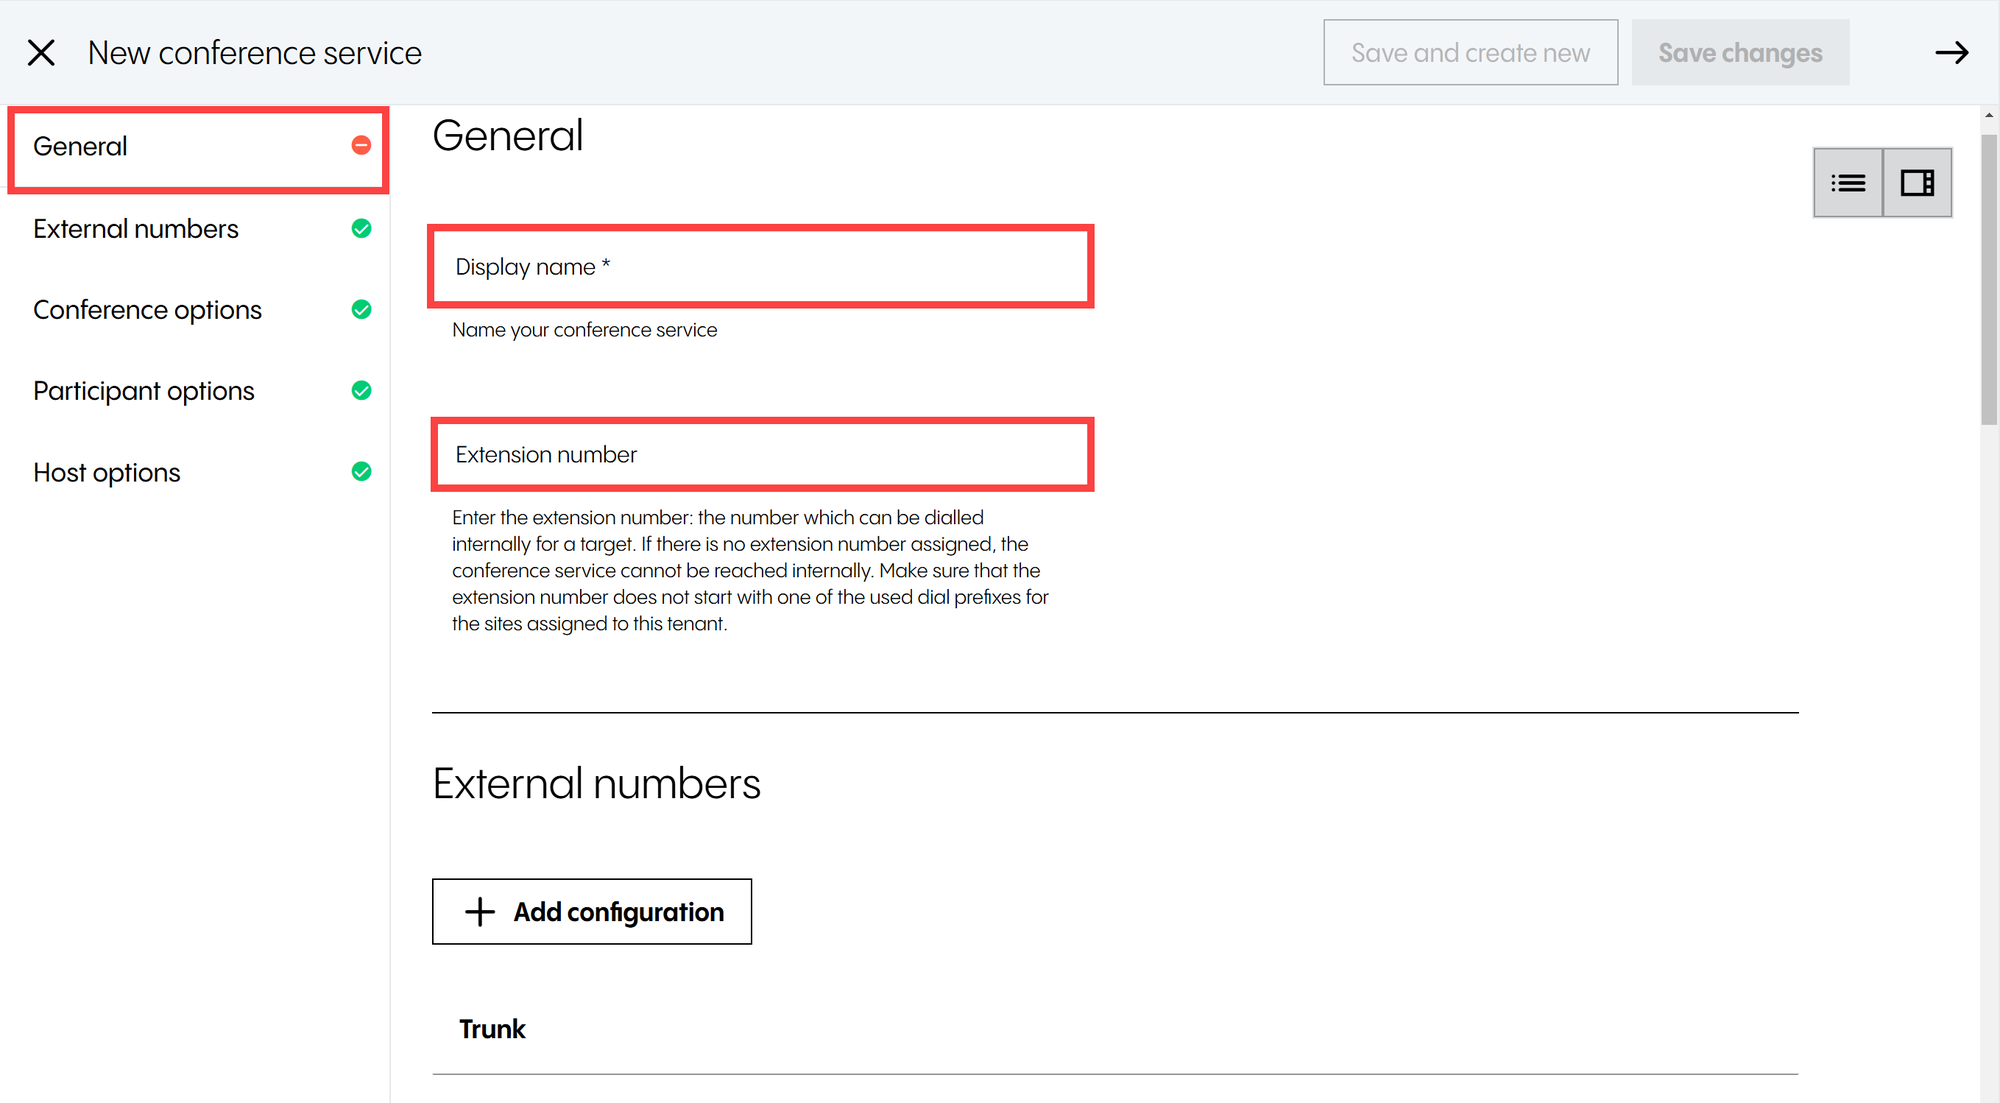
Display name | Assigns a name to the conference. Mandatory field, can be up to 50 characters. The same rules apply as in Section Phone extensions. |
Extension | Assigns an internal extension number. Please note that assigning an extension number is not mandatory, so this field can be left blank. Bear in mind that the extension number is also the conference room number. If you decide to assign an extension number, bear in mind that the same rules apply as in Section Phone extensions. |
7.1.2 External numbers
External numbers
Under External numbers, you have the following options:
Add configuration | Assigns one or more DDIs (inbound numbers) to the conference service For more information, see External numbers (DDI). |
7.1.3 Conference options
Conference options
Under Conference options, you have the following options:
Language | Selects the language for the conference service. Please note that the default language is set to German. |
Play music | Activates/deactivates the option to play music if there is only one participant present |
7.1.4 Participant options
Participant options
Participant and host options are very similar. However, participants have a limited set of options compared to moderators.
Under Participant options, you have the following:
Participant PIN | Sets a PIN to join the meeting. Please note that the PIN is autogenerated and unique for each conference. |
Signal join/leave | Plays the acoustic signal to other participants when a participant joins or leaves the conference. |
Announce join/leave | Asks new participants for their names. The names of new participants are then announced to the participants when they join or leave the conference. |
Announce count | Announces the number of people who are already connected to the conference room. The announcement takes place after entering the PIN, but before being connected to the conference. |
Permanently muted | Mutes all participants; only the host can talk. |
7.1.5 Host options
Host options
Since the participant and host options are very similar, the ones already described under Participant options will not be further explored in this section.
Under Host options, you have the following options unique to the hosts:
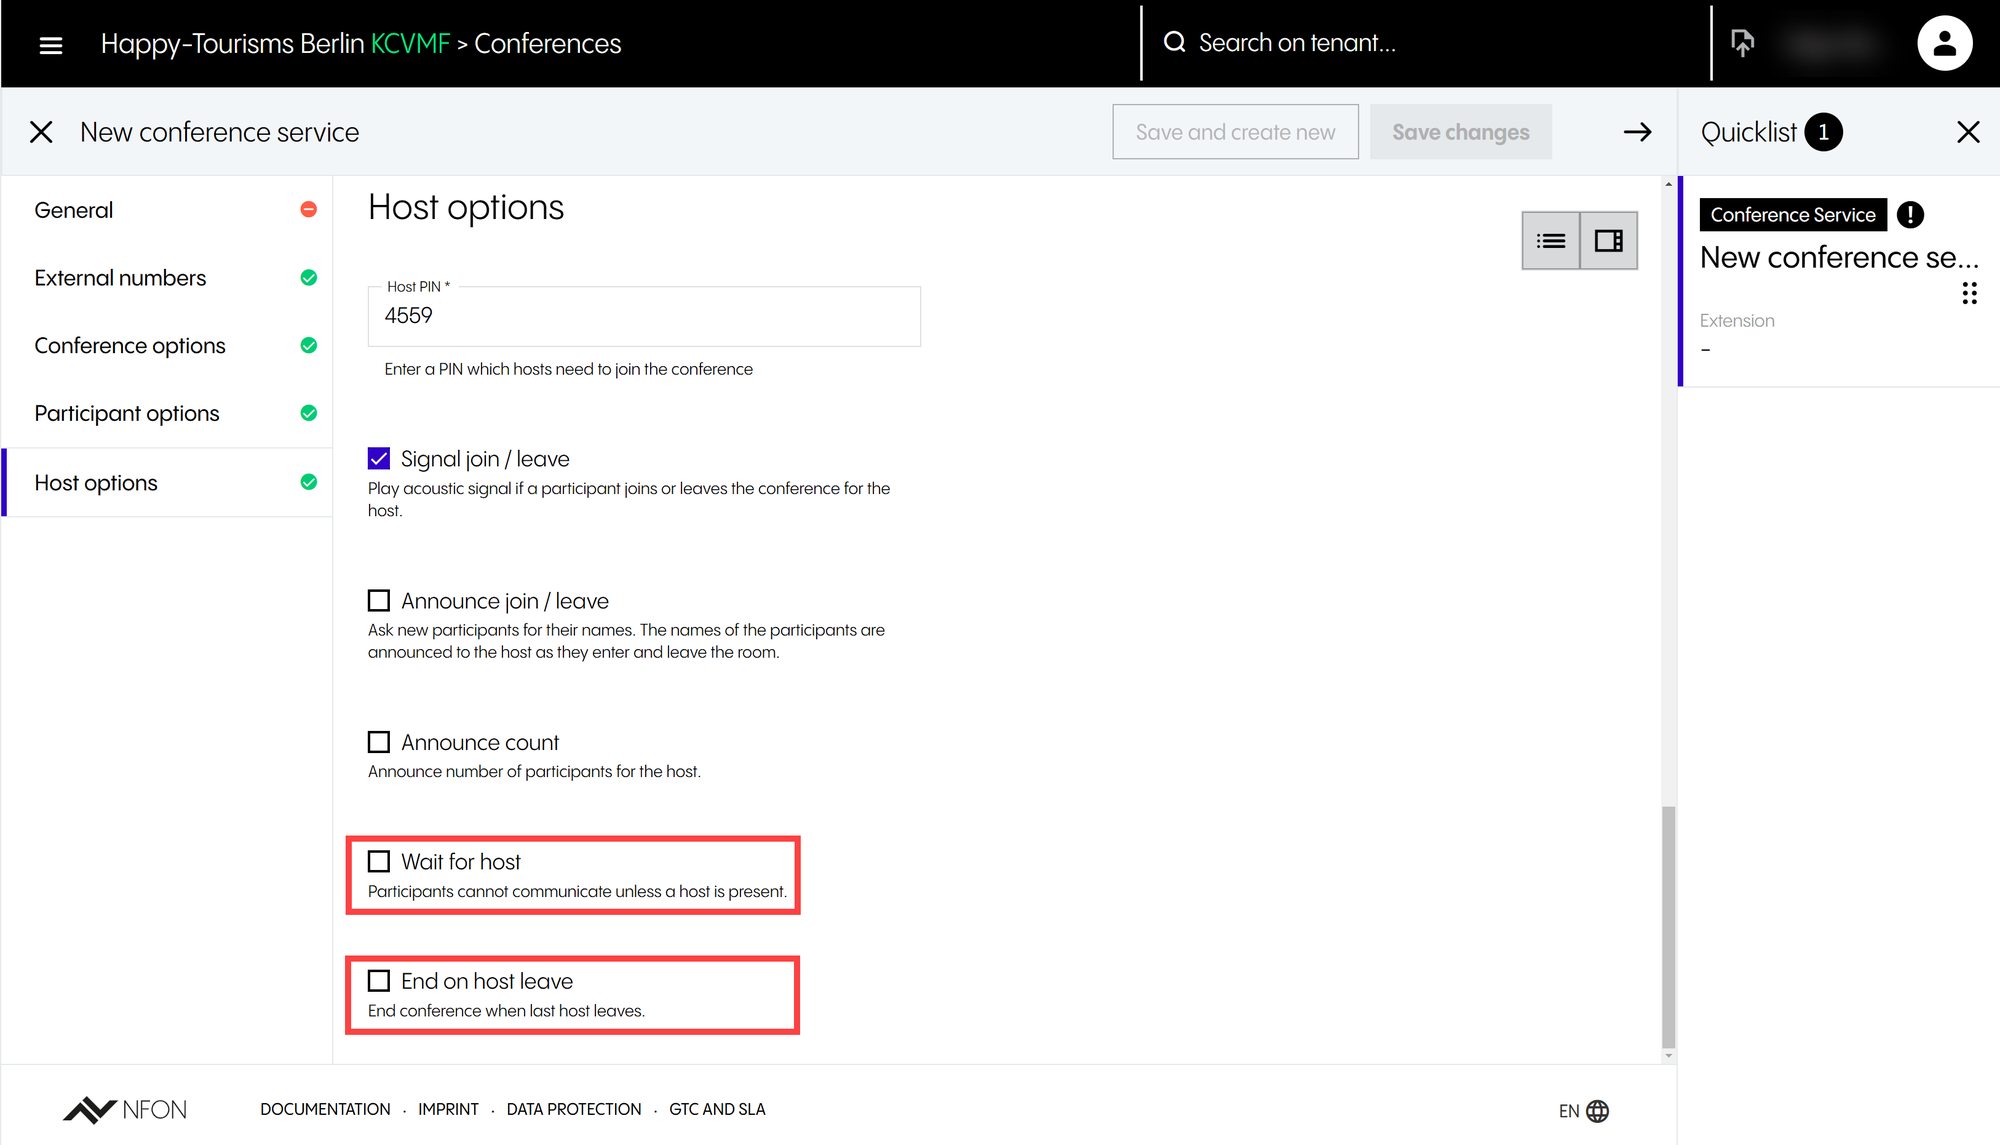
Wait for host | When activated, locks all communication until a host joins the conference. |
End on host leave | When activated, ends the conference when the last host leaves. Bear in mind that if a host has joined the conference from their mobile phone and the connection is lost, the conference call will end and all the participants will be disconnected. |
7.2 Groups
Overview
In this section, you will learn how to configure a group service.
A group service is the first of three services that enable you to distribute calls to a group of phone extensions, the other two being the queue and skill services.
A group service can have up to two purposes:
It can be a ring group
It can be a pick-up group.
At the very least, it will be a ring group, even if you haven’t configured an extension number or an inbound number for it. This is because it’s always possible to dial a service target using a function code.
A ring group will ring all extensions that are members of the group at the same time. It will also ring all devices that are associated with these extensions, so use this with caution. Furthermore, if the phone extensions configured in the ring group have call waiting enabled, the ring group will present calls to these extensions as well.
Please note that ring groups are not affected by the call forwarding settings on phone extensions that are members of the group. This means that if one of the extensions was set up with a call forwarding always to voicemail, for example, it will ignore it and still make the devices associated with this extension ring, unless the devices on that extension are all on DND.
Please note that on the NFON cloud telephone system, a phone extension can be a member of more than one ring group.
A pick-up group allows users to pick up a call that is ringing on another phone extension that is part of the same group. This includes calls that are coming via the ACD (queue or skill services).
In this view, you can:
Add a new entry
Select one, several or all entries and delete them
Edit, clone, or delete an entry, or copy it to a clipboard (you can also edit an entry by double-clicking on it)
Select how many entries you want to have on the page
Search for a group
TIP
You have the option of cloning a group if you want to duplicate the group with the same or similar settings.
7.2.1 General
General
Under General, you have the following options:
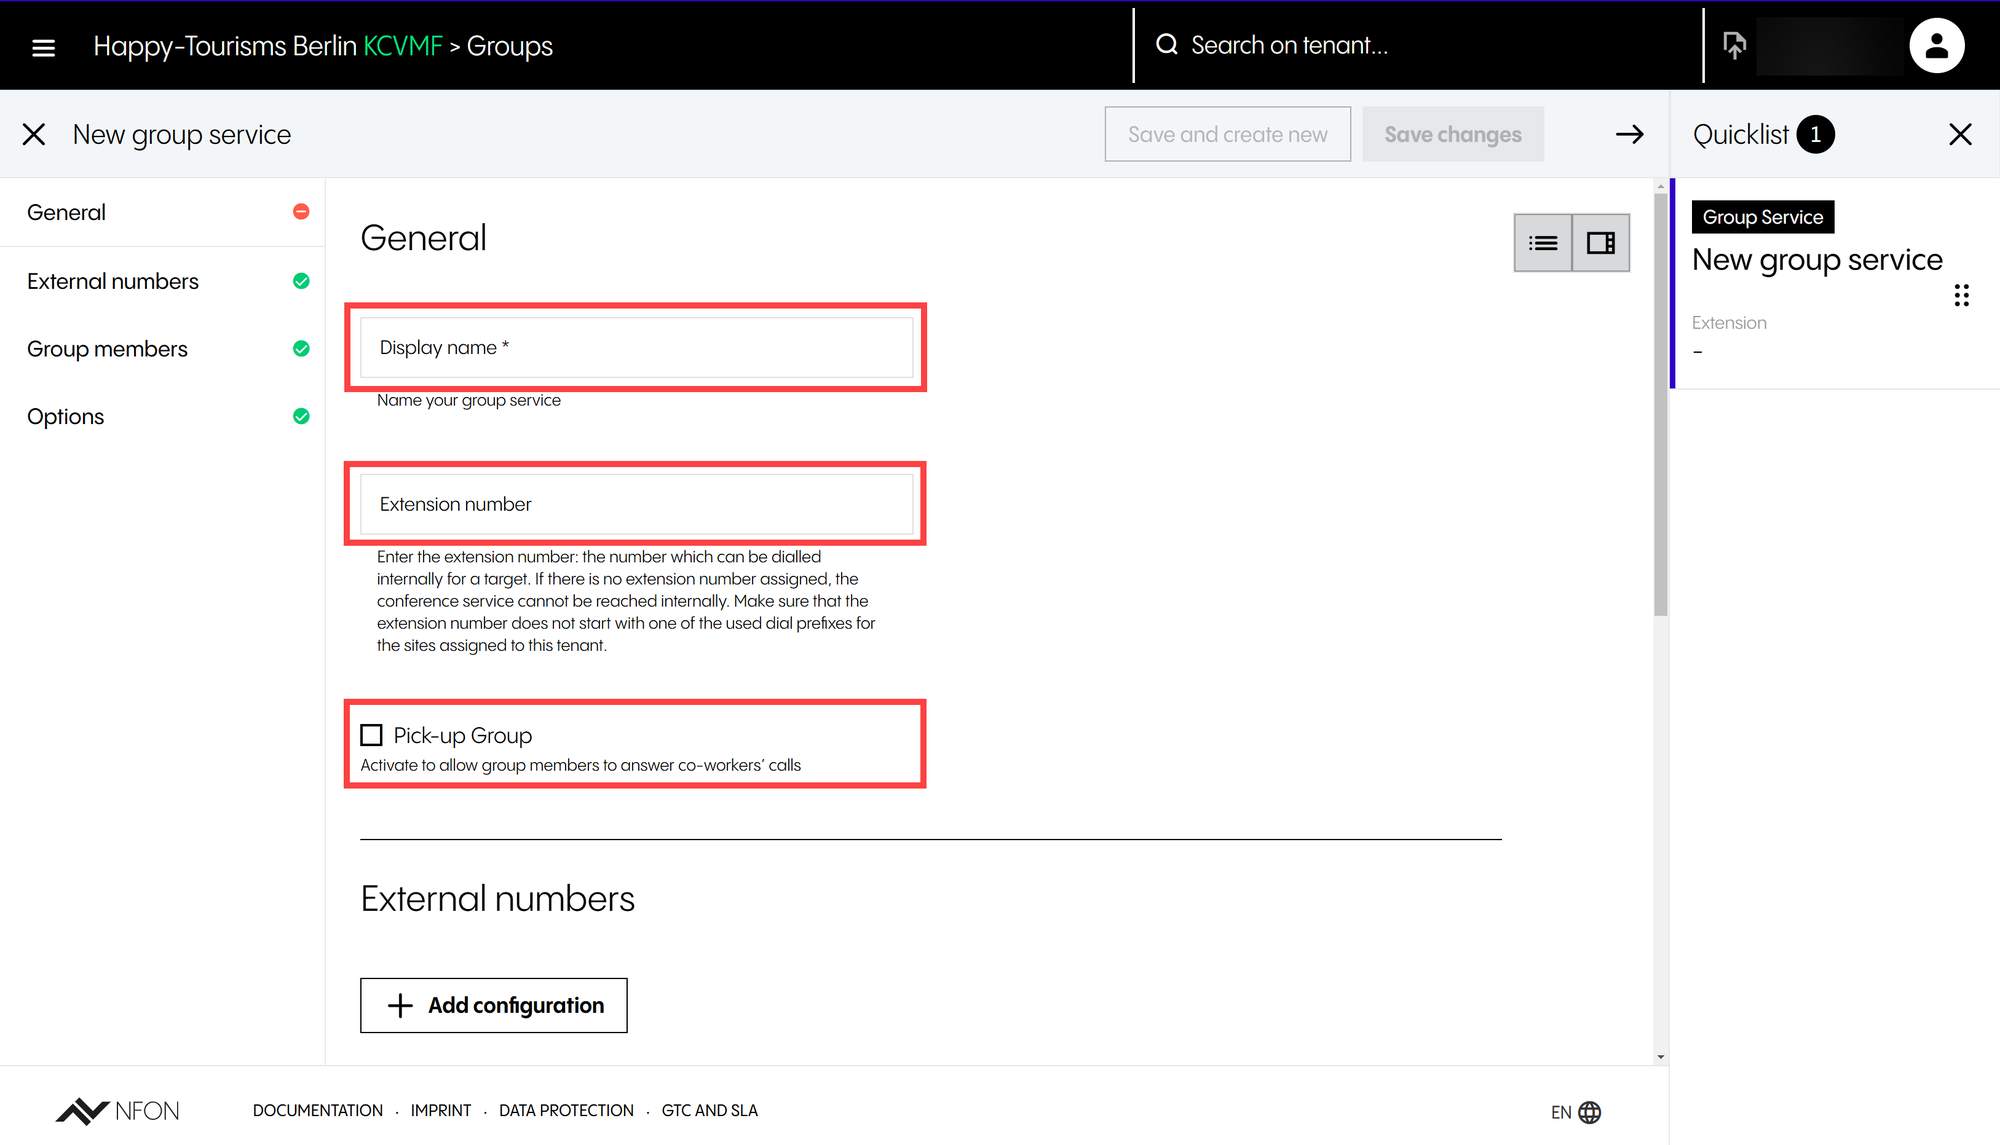
Display name | Assigns a name to the group. Mandatory field, can be up to 50 characters. The same rules apply as in Section Phone extensions. |
Extension | Assigns an internal extension number. Please note that assigning an extension number is not mandatory, so this field can be left blank. If you decide to assign an extension number, please bear in mind that the same rules and guidance apply here as for phone extensions, see Phone extensions. |
Pick-up group | Activates/deactivates the option for group members to answer their co-workers' calls. When enabled, the group service will be a pick-up group as well as a ring group. Members of the group will be able to pick up calls for other phone extensions within that group, either using a function key or function code (star code 3 or 3 + extension number). |
7.2.2 External numbers
External numbers
Under External numbers, you can add one or more DDIs (inbound numbers) to the group service.
Please note that the same rules and guidance apply here as for phone extensions, see External numbers (DDI).
7.2.3 Group members
Group members
In this section, you can configure phone extensions that are part of the group service.
Under Group members, you can add or delete group members.
Important
Please note that:
- You can only select phone extensions to be part of the group
- Group members can only be managed via the Admin Portal: End users cannot add or remove themselves from the group using star codes, XML Menus or the Cloudya apps.
7.2.4 Options
Options
Under Options, you have the following:
Redirect after timeout | Activates/deactivates redirecting a call after a specified timeout; optional setting. The default value is 15. The timeout delay is used to specify how long, in seconds, the telephone system will make the phone extensions that are members of that group ring. Most telephone handsets are configured with a hard timeout setting, upon which the phone will give up and reject the call (stop ringing). Note that this value depends on the handset manufacturer, so there is no guarantee that all phones will ring for the same length of time if you use different device manufacturers and models. Bear in mind that, unlike other services, the ring group won’t try to deliver calls to the phone extensions again. It will only try once and give up. |
Timeout (seconds) | Sets a timeout for the group after which the call is redirected. |
Action on timeout | Selects an automatic action on timeout from a drop-down list The options are
The action on timeout will be used when:
|
Target | Selects a redirection target from a drop-down list. Please note that you can redirect the call either to a phone extension or its voicemail. Please note that you can only select an existing target from the drop-down list, and you won’t be able to set the destination to an external number. Should you need to do so, you will need to configure a phone extension with a default call forwarding configured to that external phone number and then select that phone extension as a destination. |
Important
Bear in mind that if the call the ring group is trying to deliver is an inbound call from an external caller, some mobile or landline telephone providers have timeout settings of their own, which dictate how long they will try to connect a call before giving up. For instance, many mobile phone service providers will cancel the call attempt if a call is not connected within 60 seconds.
Therefore, never leave something to chance and always configure a timeout delay.
[We would recommend setting the timeout delay to a value between 15 (this will give a chance to the end user to answer the call) and 60 seconds (you don’t get dropped calls by the caller telephone provider).
Important
You should be particularly cautious when using ring groups in conjunction with the NFON mobile client.
Bear in mind that should the mobile client be unreachable over a data connection (3/4G or Wi-Fi), the NFON mobile app controller will attempt to reach the mobile by calling its GSM / mobile number.
What does this mean in the ring group context? If one of the devices on a phone extension is an NFON mobile client, which is not currently reachable over the data connection, there is a risk that the call coming via the ring group will end up in the mobile phone voicemail box. Furthermore, the caller could hear the following message from the mobile network on which that mobile phone is connected: “This mobile phone is not accepting calls at present. Try to call again later or try sending a SMS”.
TIP
Please note that the ring group will stop ringing all the other members as soon as someone from the group answers the call.
You can use Busy Lamp Field buttons to pick up calls:
When a call rings on another phone extension and, if the phone extension of the user trying to pick up that call is in the same group, pressing the flashing BLF button on their phone handset will initiate a directed pick-up.
7.3 Queues
7.3.1 List
Overview
In this section, you will learn how to configure and manage a queue service.
Automatic Call Distribution (ACD), or call queuing, provides a way for a telephony system to queue up incoming calls, internal and/or external. The ACD aggregates multiple calls into a holding pattern and assigns each call a rank that determines the order in which that call should be delivered to an available member (typically, first in, first out). When a member becomes available, the highest-ranked call in the queue is delivered to that member, and everyone else in the queue moves up a rank.
The advantage of ACD to the callers is that they don’t have to keep dialling back trying to reach someone, and the advantages to the organisations are that they are able to better service their customers and to temporarily handle situations where there are more callers than there are people available to answer the calls.
While there are two types of queues (inbound and outbound) that can be configured on the NFON Telephone System, we will mainly concentrate on the inbound queue in this section.
There are two types of queues on the NFON cloud telephone system:
Inbound queues
Outbound queues
An inbound queue is when the telephone system routes incoming calls to queue members who are shown as ready (or open), in a pre-programmed sequence. In contrast, an outbound queue is formed merely to collect the outbound call statistics for the queue members and to generate call analytics information. The outbound queue doesn’t route or distribute calls in any way.
Members are phone extensions which can join or leave a queue using the methods listed below, without supervisory control or pre-approval:
Dialling a star code from their phone extension
Using the XML menu on a device (on certified devices and if supported)
Cloudya app.
In this view, you can:
Add a new entry
Select one, several or all entries and delete them
Edit, clone, or delete an entry, or copy it to a clipboard (you can also edit an entry by double-clicking on it)
Select how many entries you want to have on the page
Search for a queue
TIP
You have the option of cloning a queue if you want to duplicate the queue with the same or similar settings.
7.3.1.1 General
General
Under General, you have the following options:
Display name | Assigns a name to the queue. |
Extension | Assigns an internal extension number. Please note that assigning an extension number is not mandatory, so this field can be left blank. If you decide to assign an extension number, please bear in mind that the same rules and guidance apply here as for phone extensions, see Phone extensions. |
Queue type | Selects the type of a queue, inbound or to monitor outbound calls. The options are:
Please note that if you have selected Outbound call monitor, the next option, Priority, won't matter and will disappear. |
Priority | Sets the value for priority (weight). This setting allows you to prioritise queues. The default value is 0, which means no priority. You can set this value between 0 and 255. Please remember that the higher the value, the higher the priority. For example, a queue with the value of 1 has priority over a queue with the value of 0. Please note that this is a way to prioritise a queue above other queues and not a way to prioritise calls. |
7.3.1.2 External numbers
External numbers
Under External numbers, you can add one or more DDIs (inbound numbers) to the queue service, just like with conference or group services.
Please note that the same rules and guidance apply here as for phone extensions, see External numbers (DDI).
7.3.1.3 Agents logged in
Agents logged in
In this section, you can add or delete queue members. The process is similar to that described under Groups.
Under Queues, however, there is an additional option, Penalty.
Within a queue, you can penalise members to lower their preference for being called when there are people waiting in a particular queue. For example, you could penalise queue members when you want them to be a member of a queue, yet to be used only when the queue gets full enough that all of the preferred agents are unavailable. The higher the penalty, the lower the preference.
By defining different penalties for each member of the queue, we can help control the preference for where calls are delivered, yet still ensure that other queue members will be available to answer calls if the preferred member is unavailable.
The default value for the penalty is 1, and the maximum value is 10.
There are a few very important rules regarding the use of penalty in conjunction with call distribution:
In most cases, the ACD will not attempt to deliver calls to members with the higher penalty whilst members with a lower penalty are available, even if these members have not answered the call.
If the ACD has started to deliver calls to members with a higher penalty, but a member with a lower penalty becomes available, it will stop and try the lowest priority members again (this happens only if the timeout per member option is set to anything other than 0).
Where are calls distributed to?
There is a difference in the way the ACD distributes calls to members when compared to a group service. A group service will deliver calls to all members simultaneously and on all their devices. In contrast, the ACD will only deliver calls to a member's primary device.
You can change the primary device using:
Admin Portal
A function code (star code) from the device that the end user wants to make their primary device
The XML menu of the device that the end user wants to make their primary device, if supported by the device
The Cloudya app.
Call forwarding configuration on queue member's phone extension
Same as the group services, the ACD will ignore any call forwarding or parallel ringing (forking) configuration when placing calls to queue members. Instead, you will define how long the ACD will try for in the Agent options section.
Important
When is an agent available?
To be available, the agent's primary device must not be on a call.
If the device is already on a call, even if that call didn’t come via the queue, the ACD will see that the device is busy and will consider it not to be available.
In contrast, if the agent is in the middle of dialling a number, but hasn’t yet placed the call, the ACD will consider the device to be available.
If the device is on DND, the ACD will consider the agent to be available. Please bear in mind that the ACD is not aware of the status and that the DND information is device-based and the central telephone system or server has no view of it.
In short, the ACD doesn’t monitor the phone extension, but rather checks if there is a call in progress on the primary device to determine if the agent is available or not.
If the device is not currently registered, or not reachable, the ACD is not aware of this information and will consider the agent to be available.
If the agent is on a call, but using another device than their primary device, for example, the NFON mobile client, the ACD checks if there is an active call on the primary device to determine if an agent is available or not. So, if an agent is making a call from another device, the ACD will consider the agent to be available.
Device status | Agent availability |
Primary device is on a call | Not available |
Primary device is ringing | Not available |
Primary device is dialling a call, but has not yet placed it | Available |
Device other than primary is on a call | Available |
Primary device is on DND | Available |
Primary device is not registered | Available |
7.3.1.4 Queue options
Queue options
Under Queue options, you have the following options:
Queue timeout | Activates/deactivates queue timeout to determine how long, in seconds, a call stays in the queue |
Timeout | Sets a time in seconds for how long a call stays in the queue The default is 30. The maximum value is 9,999 seconds (2 hours 46 minutes and 39 seconds). |
Action on timeout | Selects an automatic action on timeout from a drop-down list. The options are:
The action on timeout will be used when:
|
Target | Selects a redirection target from a drop-down list. Please note that you can only select an existing target from the drop-down list, and you won’t be able to set the destination to an external number. |
Action when no agent is subscribed | Determines what happens if a call enters a queue with no agents within the queue. The options are:
The default value is Accept call to the queue anyway. This means that the callers can start queueing even if no agents are logged into the queue. We recommend setting this to another option. Please note that if this option is enabled and an agent is part of the queue but is not available, this setting will be ignored. |
7.3.1.5 Caller options
Caller options
The Caller options are settings that will allow you to configure what the caller will hear when joining the queue.
Please note that to be able to use the options described below, you will need to have previously added announcements.
Under Caller options, you have the following:
Initial announcement | Selects an initial announcement to be played when a caller joins the queue. If configured, the announcement will be played once and only once. You can select an announcement from a drop-down list. Please note that:
|
Periodic announcement | Selects a periodic announcement to be played when a caller is on hold. You can select an announcement from a drop-down list. |
Delay (seconds) | Specifies the interval in seconds between periodic announcements. The default value is 30. Bear in mind that the periodic announcement interval needs to be set to a greater value than the announcement duration. Setting an interval value that is less than the announcement duration might break the queue, meaning that callers are unable to join. |
Queue position | Activates/deactivates announcing the position of a call in the queue. |
Delay (seconds) | Specifies the interval (in seconds) at which the callers will hear a message informing them of their position in the queue. The default value is 30. The maximum value is 999. |
Music on hold | Selects what the caller will hear when in the queue. The options are:
|
Custom music on hold | Selects an announcement of the type Music on hold. |
7.3.1.6 Agent options
Agent options
The Agent options are settings that will allow you to configure the ACD behaviour for distributing calls to agents.
The ACD distributes incoming calls in the order of arrival to the first available agent. The system answers each call immediately and, if necessary, holds it in a queue until it can be directed to the next available agent.
Please note that:
The ACD will always distribute calls in sequence: Longest call waiting will be first to be distributed to agents (first in / first out)
The ACD is capable of distributing multiple calls at once (i.e. it won’t wait for the first call to be answered by an agent to start distributing another call)
Calls that are being distributed are no longer considered to be waiting in the queue
When the ACD has attempted to distribute a call, and none of the agents have answered, the call will go back into the queue to be picked up for distribution by the ACD again.
Under Agent options, you have the following:
Selection strategy | Selects a strategy for an incoming call to be distributed to an agent. You can select a strategy from a drop-down list. The options are:
|
Activate timeout per agent (seconds) | Specifies the time how long, in seconds, ACD will make the primary device of the agent ring before pulling the call back into the queue, ready to be distributed again (can only be configured when selecting Round robin or Random). The default value is 30. |
Delay the next call after agent timeout (seconds) | Specifies the time in seconds to hold the call in the queue before trying to connect it to another available agent. The default value is 30. |
Activate wrap-up time per agent (seconds) | Specifies the time required by an agent after a call has ended to complete any work directly associated with the call. |
Wrap-up time (seconds) | Specifies the wrap-up time in seconds. The default value is 60. |
Hold duration | Activates/deactivates a message indicating how long the call has been in the queue for. Please note that the caller will be connected only once the agent has heard this message. |
Announcement to agent | When activated, plays the selected announcement to agents before connecting the caller to them. For example, this announcement can be used to inform the agent about which queue/service the caller came from. Please note that it only draws from the pool of General announcements. |
Please remember the following:
You should avoid configuring a queue that callers can join even if no agents are logged in
You should always configure a queuing timeout and an action on timeout for calls to go to when this timeout is reached
Calls coming via a queue can get picked up by other extensions, but only if they're in the same pick-up group
The ACD will ignore any call forwarding configuration on agent phone extensions
You should always configure a timeout per agent that gives enough time for agents to answer the phone, without setting it up to a value that’s too high and increase waiting time
You should stay away from using the Ring all strategy
Always configure all timeout options on a queue service
7.3.2 Profile
Overview
In this section, you will learn how to create and manage queue profiles. A queue profile is a set of individual queues which allows an egent to log in and out of all the queues in the set simultaneously, without the need to log in or out of each of them individually.
In this view, you can:
Add a new entry
Select one, several or all entries and delete them
Edit, clone, delete an entry or copy it to a clipboard or copy text from a cell (you can also edit an entry by double-clicking on it)
Select how many entries you want to have on the page
Search for a queue profile
NOTE
Please note that the penalties are saved when an agent logs in or out of the queues using the new queue profile interface in the user apps.
Penalties are NOT saved when logging in our out of queues by any other means, for example, individual queues or star codes.
7.3.2.1 General
General
Under General, you have the following options:
Display name | Assigns a name to the queue profile |
Colour | Selects a colour to identify your queue profile |
7.3.2.2 Queues
Queues
Under Queues, you have the following options:
Add queues to profile | Adds one or several queues to your queue profile |
7.3.2.3 Visibility
Visibility
Under Visibility, you have the following options:
Private mode | Activates / deactivates the visibility limitation of queue profile When deactivated, the queue profile will be visible for all phone extensions of this tenant. When activated, it will be visible only for phone extensions which have been added. |
7.4 Skills
Overview
In this section, you will learn how to configure and manage a skill service.
The skill service is using the ACD in exactly the same way the queue service does. It does, however, use a different method when it comes to configuring agents and then selecting them when a call comes in.
There are two main differences between a queue and a skill service:
Skill weight works in exactly the opposite way from the penalty weight
Agents cannot remove themselves from the skill service.
Since all the other settings are exactly the same as with queues, this section will only describe the options different to those in queue services.
In this view, you can:
Add a new entry
Select one, several or all entries and delete them
Edit, clone, or delete an entry, or copy it to a clipboard (you can also edit an entry by double-clicking on it)
Select how many entries you want to have on the page
Search for a skill
TIP
You have the option of cloning a skill if you want to duplicate the skill with the same or similar settings.
Skill level
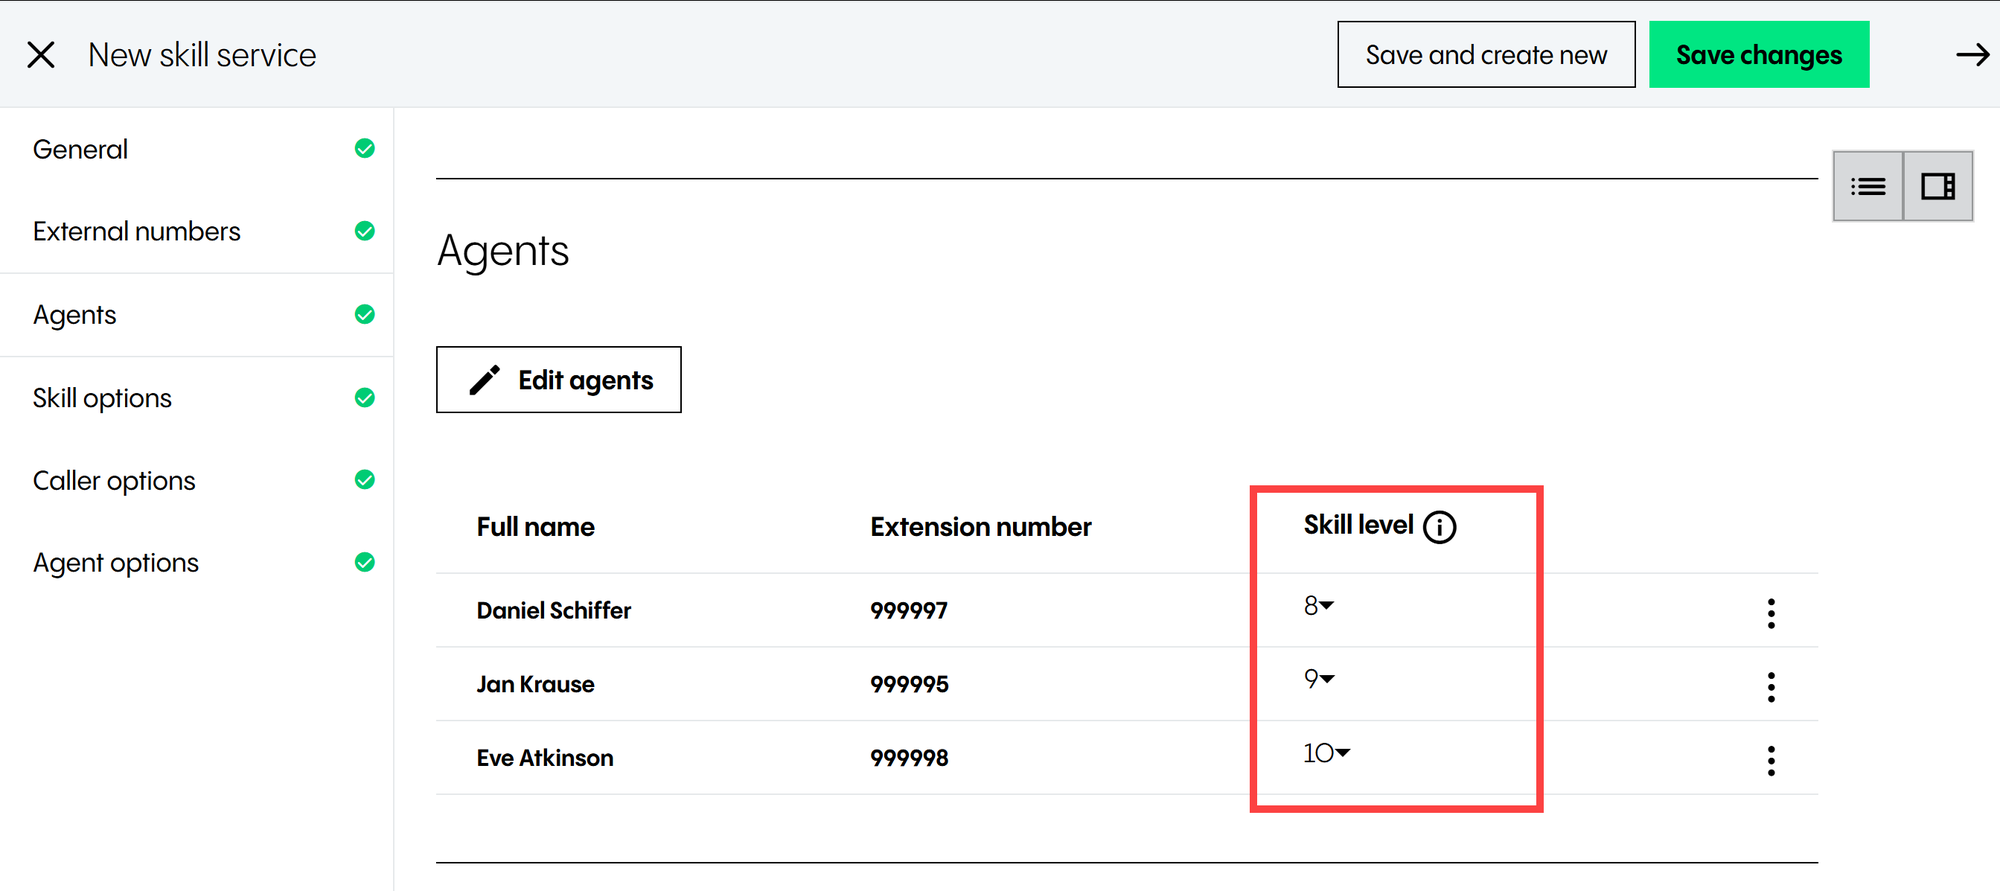
In contrast to a queue, where you penalise agents to lower their preference for being called, in the skill service, agents with the highest skill level will be called first. For example, you would configure the skill in such a way that people with the most skill for a particular service will be called before people with less skills.
The default value for the skill level is 1, with a maximum value of 10.
By defining a different skill level for each member of the service, we can help control the preference for where callers are delivered, yet still ensure that other agents will be available to answer calls if the preferred agent is unavailable.
Please bear in mind that:
In most cases, the ACD will not attempt to deliver calls to agents with lower skills whilst agents with a higher skill are available, even if these agents have not answered the call
If the ACD has started to deliver calls to agents with a lower skill, but an agent with a higher skill becomes available, it will stop and try the highest skilled agents again.
Subscribing/unsubscribing from a skill service
Bear in mind that phone extensions can be a member of multiple skill services.
Adding a phone extension to a skill service can be done via:
Skills
Phone extensions
Unlike the queue services, phone extensions / end users cannot add or remove themselves from a skill service. They will need to log in or log out from their skill set.
There is currently only one method available for end users to subscribe or unsubscribe from their skill set:
Using function codes (star codes).
The system doesn’t actually remove the agent from the list and will remember the skill level that was configured via the Admin Portal. When the agents unsubscribe from the service, it means they are still listed under it, but are no longer receiving calls. Please note that the agent can still stay logged into their device, but unsubscribe from the skill.
Agents will only be able to subscribe or unsubscribe from their entire skill set and won’t be able to pick which skill service they’re a member of.
Under Extension > Phones > Skills, you can see what skills an agent is a member of. An administrator can toggle the button on to make an agent an active member of the skill, or toggle it off, in which case the agent won't receive any calls even when subscribed to a skill. Logged in as agent for skill set subscribes the agent to the skill set. So, if an agent has unsubscribed from a skill using a star code, an administrator can subscribe the agent using this option.
7.5 IVRs
Overview
In this section, you will learn how to configure and manage an IVR service.
An IVR service is the first of two services that manage inbound call flows.
IVR stands for Interactive Voice Response and is often referred to as voice menus. It’s used to describe a system where a caller navigates through a system by using the touch-tone keys on their telephone keypad. An IVR is essentially an announcement / series of announcements. The caller is given the choice of several interactive features, for example: "For Sales, press 1", "For Technical Support, press 2" etc. very much the same as you would get if you were calling your mobile network provider or an online retailer, etc.
When the caller presses a key on their phone keypad, the phone emits two tones, known as DTMF tones. DTMF stands for Dual Tone Multi-Frequency. The NFON cloud telephone system recognises the DTMF tones and responds accordingly.
Please note that despite what the name seems to imply, the IVR service doesn’t provide any capabilities for voice or speech recognition, and will only recognise DTMF tones to navigate the menus.
In this view, you can:
Add a new entry
Select one, several or all entries and delete them
Edit, clone, or delete an entry, or copy it to a clipboard (you can also edit an entry by double-clicking on it)
Select how many entries you want to have on the page
Search for an IVR
TIP
You have the option of cloning an IVR if you want to duplicate the IVR with the same or similar settings.
7.5.1 General
General
Under General, you have the following options:
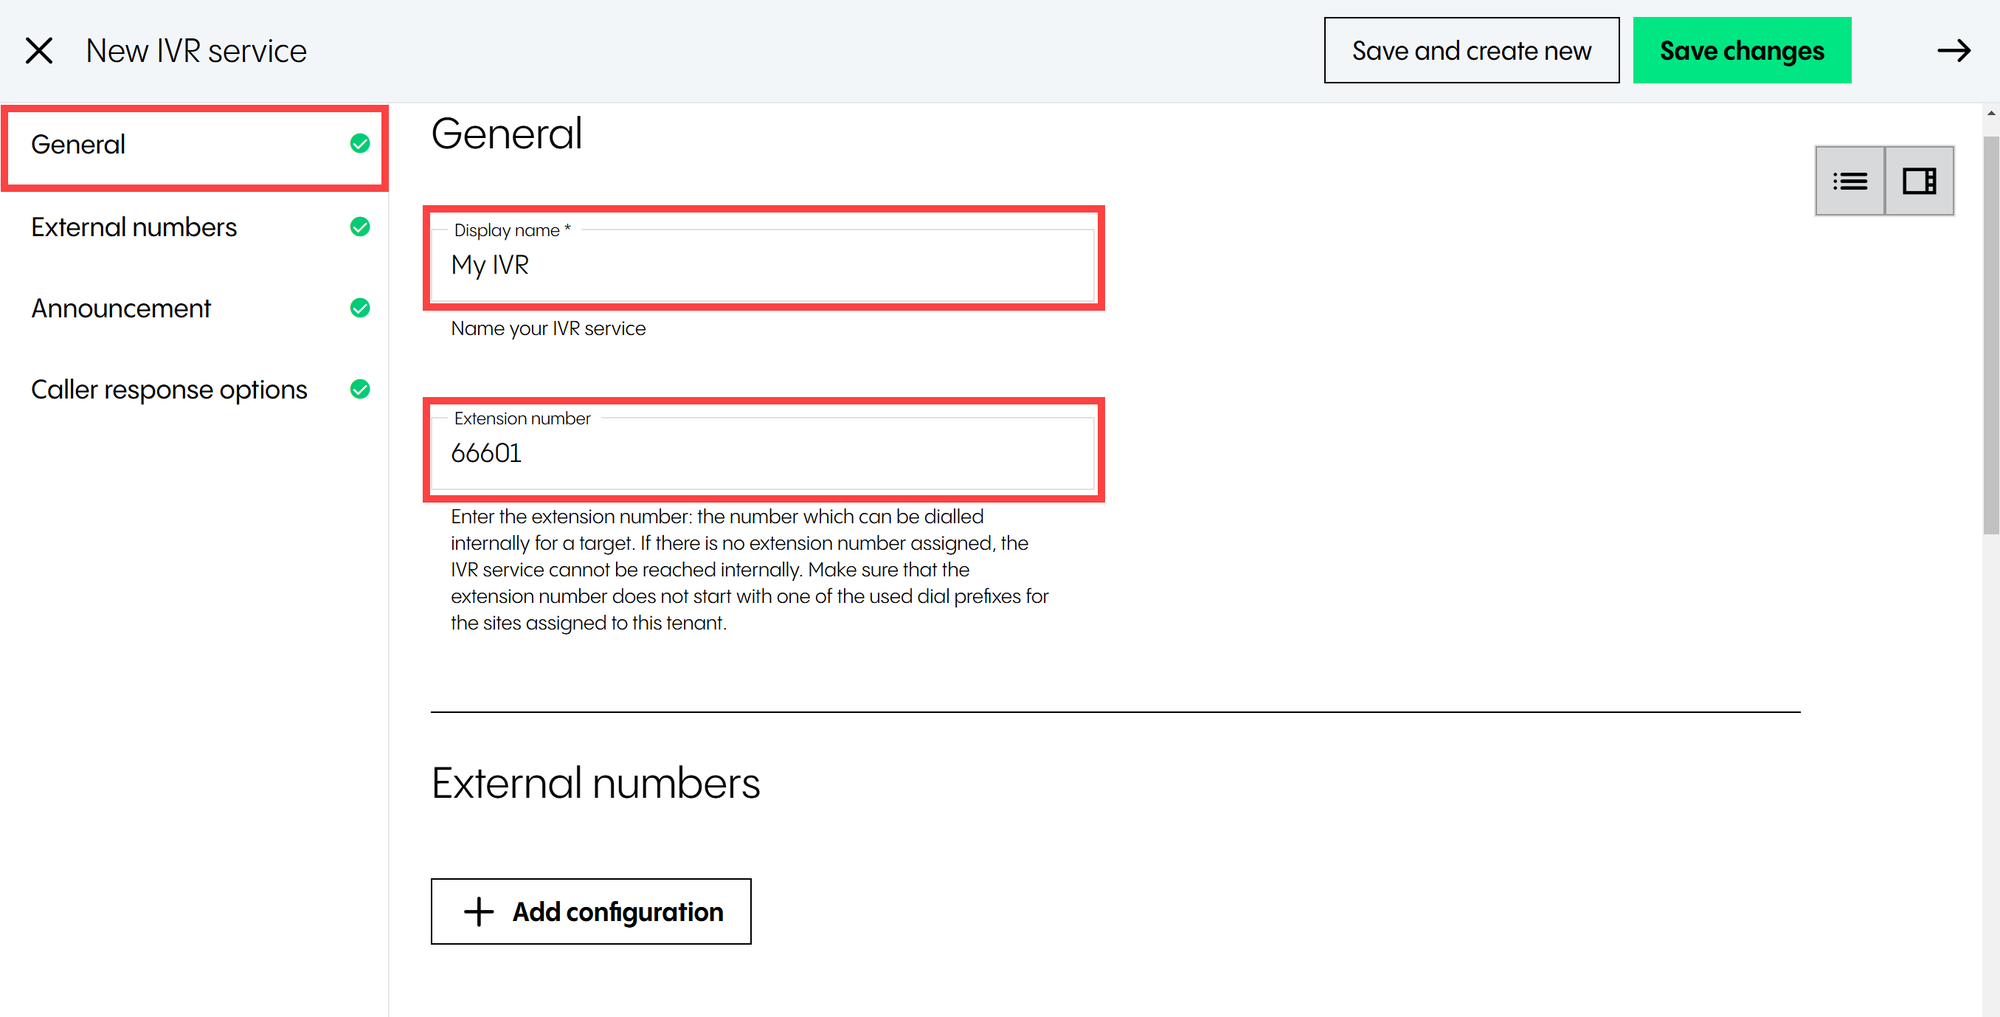
Display name | Assigns a name to the IVR. Mandatory field, can be up to 50 characters. The same rules apply as in Section Phone extensions. |
Extension | Assigns an internal extension number. Please note that assigning an extension number is not mandatory, so this field can be left blank. If you decide to assign an extension number, bear in mind that the same rules apply as in Section Phone extensions. |
7.5.2 External numbers
External numbers
Under External numbers, you can add one or more DDIs (inbound numbers) to the IVR service.
Please note that the same rules and guidance apply here as for phone extensions, see External numbers (DDI).
7.5.3 Announcement
Announcement
Under Announcement, you have the following options:
Play announcement | Activates selecting the announcement. You can configure only one announcement, which will be played when a caller joins the service. |
Announcement | Selects the announcement which will be played when a caller joins the service. Please note that this can only be a general announcement, not music on hold. Bear in mind that although the field is not mandatory, you should always select an announcement to be played by the IVR service; otherwise, the NFON cloud telephone system will answer the call but won’t play any audio, which could be very confusing to the caller and lead to complaints. |
7.5.4 Caller response options
Caller response options
The Caller response options are settings that will allow you to configure an IVR.
Under Caller response options, you have the following:
Maximum number of digits | Selects the maximum number of digits (between 1 and 10) for this IVR service. Unlike with some other telephony systems, the NFON IVR service allows you to configure key assignments to options that have more than one digit. The default option is 1, which means that the IVR will expect the caller to type in one digit before starting to look for a destination to forward the call to. The maximum value for this field is 10, which means that the system would either start looking for a destination once the caller has entered 10 digits on their keypad, or will wait for about 5 seconds after the first digit is entered before checking if the destination is configured. Please note that this setting works in conjunction with Forward call to extension. |
Forward call to extension | Activates / deactivates forwarding a call to an extension. If activated: If the entered number does not match any of the existing caller response options, the number will be used as an extension number, and the call will be forwarded to the extension. |
Add caller response options | Adds a caller response option. You need to configure the following two options:
To add a caller response option:
|
Timeout | Activates/deactivates an automatic action when a caller has not entered any response option. |
Timeout (seconds) | Specifies the interval (in seconds, between 1 and 999) after which the action on timeout will take place. The default value is 15. The maximum value is 999. Please note that the timeout will only kick in once the announcement has fully played. That means, if the announcement is 15 seconds and the timeout is set to 5, the IVR won't initiate the action on timeout until after 20 seconds. |
Action on timeout | Selects an automatic action on timeout. Action on timeout will be used after the announcement has been fully played, the timeout in seconds has expired, and
|
Target | Selects a target to which the call will be forwarded. The options are:
|
Important
Make sure that
you have selected an announcement to be played by the IVR service
that the maximum number of digits is greater than or equal to the maximum extension length
you have configured a timeout and action on timeout.
7.6 Time Control Services
Overview
In this section, you will learn how to configure and manage a Time Control service.
A Time Control service is the second of two services that manage inbound call flows. It is based on the time of day and the day of the week. Therefore, a Time Control service is actually two services merged into one:
Time of the day routing
Day of the week routing.
A Time Control service will allow you to control the destination of incoming calls based on the day of the week and the time of the day. It’s also logic-based (in the timeframe specified) and binary (in or out / on or off).
In this view, you can:
Add a new entry
Select one, several or all entries and delete them
Edit, clone, or delete an entry, or copy it to a clipboard (you can also edit an entry by double-clicking on it)
Select how many entries you want to have on the page
Search for an IVR
TIP
You have the option of cloning a Time Control service if you want to duplicate the Time Control service with the same or similar settings.
7.6.1 General
General
Under General, you have the following options:
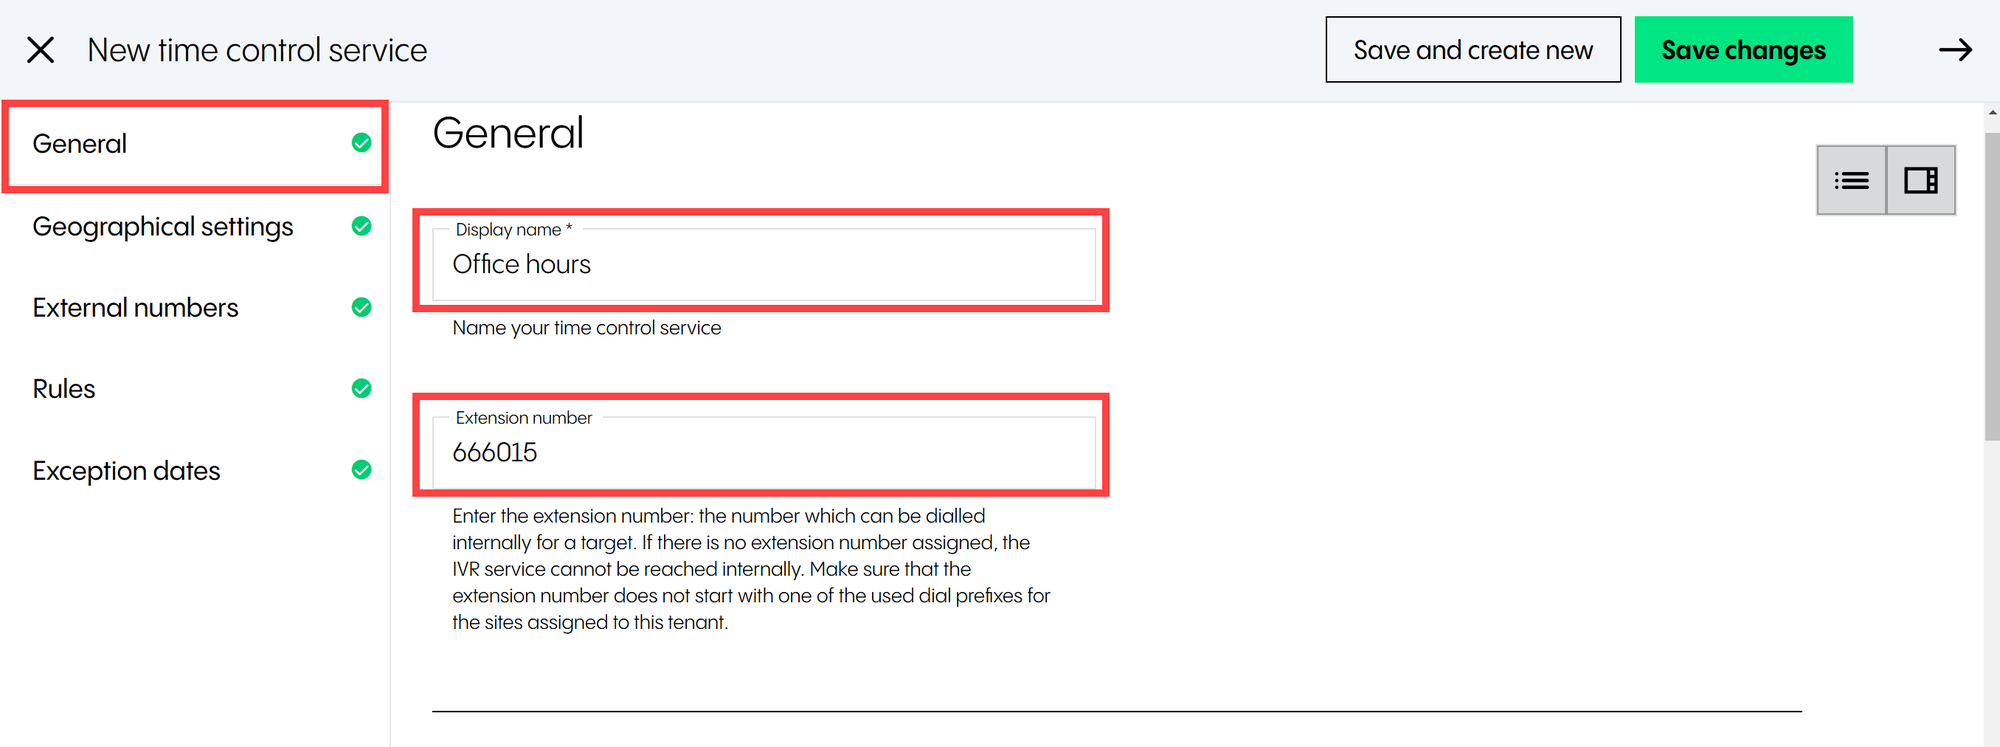
Display name | Assigns a name to the Time Control service. Mandatory field, can be up to 50 characters. The same rules apply as in Section Phone extensions. |
Extension | Assigns an internal extension number. Please note that assigning an extension number is not mandatory, so this field can be left blank. If you decide to assign an extension number, bear in mind that the same rules apply as in Section Phone extensions. |
7.6.2 Geographical settings
Geographical settings
Under Geographical settings, you configure the time zone, which is crucial for configuring a Time Control service.
Under Geographical settings, you have the following options:
Time zone | Selects the time zone for the Time Control service You can inherit the time zone configuration from the tenant configuration or select a different time zone from the drop-down list. |
7.6.3 External numbers
External numbers
Under External numbers, you can add one or more DDIs (inbound numbers) to the Time Control service.
Please note that the same rules and guidance apply here as for phone extensions, see External numbers (DDI).
7.6.4 Rules
Rules
Under Rules, you can configure several rules which interact with each other.
The following options are available:
From weekday | Selects the starting day for the period during which calls will be routed according to the defined action if within the time interval |
To weekday | Selects the ending day for the period during which calls will be routed according to the defined action if within the time interval Please note that From weekday and To weekday are a range rather than individual settings. |
Start time on each day | Selects the start time on each day for the period during which calls will be routed according to the defined action if within the time interval |
End time on each day | Selects the end time on each day for the period during which calls will be routed according to the defined action if within the time interval Please note that the start and end times apply to each day individually. For example, if you set the From weekday to Monday and To weekday to Tuesday, and Start time to 8:00 and End time to 18:00, then the days and times will be Monday 8.00 to 18:00 and Tuesday 8:00 to 18:00. |
Action if within time intervals | Selects an action if a call happens within the selected time interval The options are:
|
Action if outside time intervals | Selects an action if a call happens outside the selected time interval The options are:
|
Bypass time evaluation | Activates / deactivates to bypass the time evaluation and forward the call directly to the selected target Optional setting, only applies to the time range, not the day range. That means that the service will ignore the set time range and will only evaluate the day range. You select which action takes place, which is inherited from the earlier configuration. The options are:
|
Important
Please note that the time of day
defines a range per day
is the first to be evaluated by the system when routing a call.
Please note that the system does not evaluate seconds, and the time shown is inclusive, for example, if the end time is set to 18:00, it means until 18:00:59 and not 17:59:59.
Setting a Time Control service to span over midnight
For example, you would like to set a day range from Sunday to Monday, with the time interval spanning across midnight, then you will need to set the time intervals for each respective day as 00:00 to 23:59, i.e. Sunday: 00:00 to 23:59 and Monday: 00:00 to 23:59.
7.6.5 Exception dates
Exception dates
Setting exception dates allows you to specify whole days or ranges on which the set time routing should be bypassed. Bear in mind that an exception will apply to a whole day, i.e. from 00:00:00 to 23:59:50.
This setting is used, for example, in case of public holidays, if the businesses are closed on a certain date/date range for the whole day.
Under Exception dates, you have the following options:
Add date | Adds a single date or a date range when calls are permanently forwarded Please note that when a date range is added, the portal will automatically convert it into individual date ranges. |
Action | Selects an action that is performed on the selected date/date range The options are:
|