5. Administration
All general settings for the portal are done in the "Administration" - area.
The elements are :
Profile, general information, e.g. email address adminstrator, passwort, call centre, etc.
Sites, if you have more than one site, you can administrate it.
Batch Import, import of Phone book entries, extensions, speed dials.
Phone book, administration of the phone book.
After you have signed in, the main navigation window appears.
Here you select: Profile, Sites, Batch Import or Phonebook.
 |
5.1. Profile
Profile
On the administration portal click the navigation item "Administration" and then select "Profile".
A new window for "Profile" with several sections is shown:
Sections | Pictures | |
Customer |
| |
Options |
| |
User details |
| |
Call recording |
| |
Pilot mode |
|




5.1.1. Customer
Customer configuration for Profile
 |
Fieldname | Description |
External Identifier | Registration name. |
Snom Transfer | Transfer characteristics for all snom devices. Information in 5.1.1.1. Snom Transfer. |
Announcement before conference entry | Aktivates conference announcement. |
5.1.1.1. snom Transfer
snom Transfer
Configuration for Profile:
The snom transfer settings have an influence on the call transfer behaviour between three persons.
Description | Behaviour snom=0 | Behaviour snom=1 | Behaviour snom=2 |
1. Accept incomming call. 2. Dial number. 3. Hang up. | Incomming call will be connected with dialed number. | Incomming call will be connected with dialed number. | Connection with callee will be disconnected, first call will be reactivated. |
1. First call. 2. Make second call. 3. Hang up. | Connection with second call will be disconnected, first call will be reactivated. | First callee will be connected with second callee. | Connection with callee will be disconnected, first call will be reactivated. |
1. Get pickup call. 2. Make second call. 3. Hang up. | Connection with callee will be disconnected, first call will be reactivated. | First call will be connected with second call. | Connection with callee will be disconnected, first call will be reactivated. |
5.1.2. Options for Profile
Options for Profile
 |
Fieldname | Description |
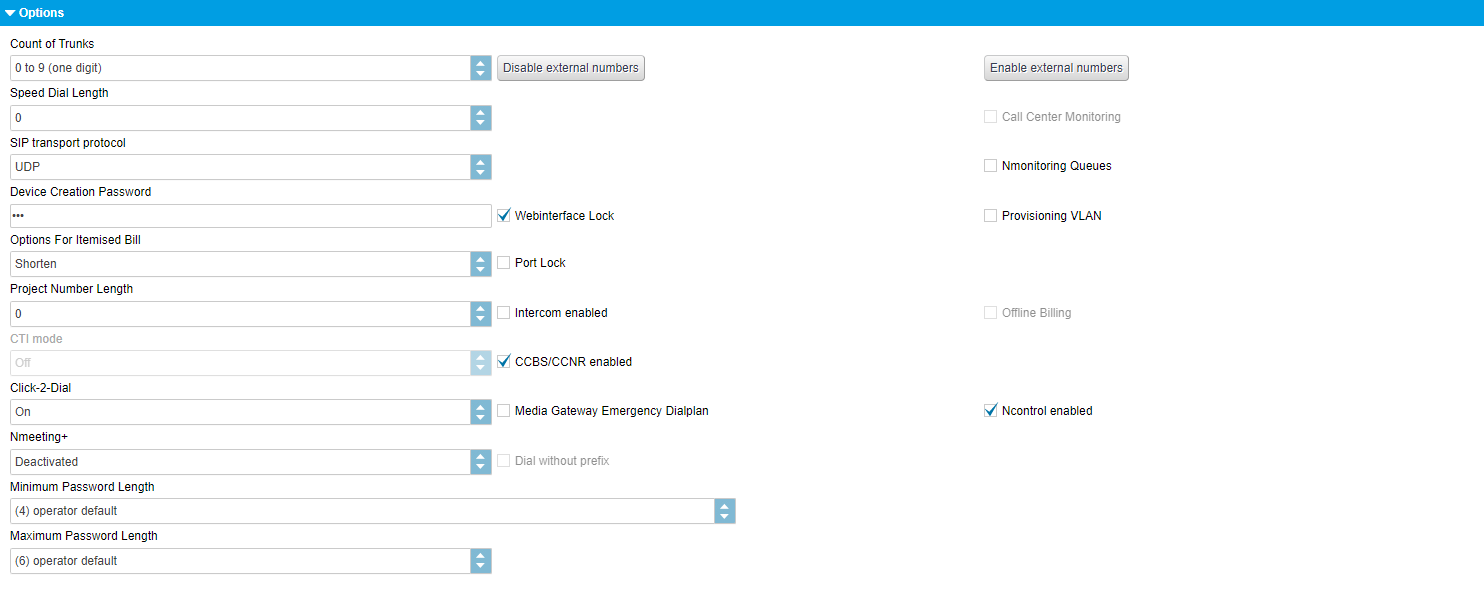
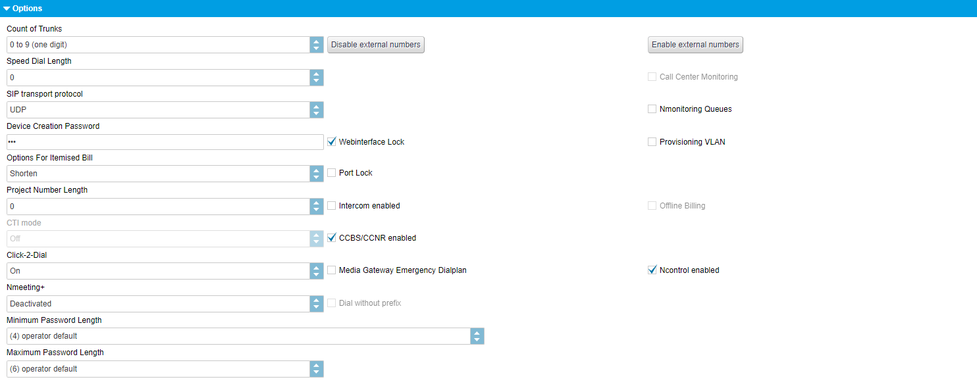
Count of trunks | Specify the number of outside lines. Specify whether you wish to use a single digit, double digit or three-digit number of outside lines. The number of outside lines is required e.g., to indicate a different telephone number when placing outside calls. (# + line number + telephone number). |
Disable external numbers | Disables all extensions from configuring call forwarding to an external telephone number. You can also allow or prohibit call forwarding to external telephone numbers per extension see 3.1.5. Call forward |
Enable external numbers | Enables all extensions to configure call forwarding to an external telephone number (e.g. mobile phone number). |
Speed dial length | Specify the speed dial length. For example, by selecting a speed dial length of “2”, you can add 100 speed dials (00-99) to your telephone system, which can then be used by dialling *2+speed dial. Speed dial lists must be added to the phone system as a .csv file. nfon does not provide support for this. |
SIP transport protocol | Activate or deactivate voice encryption (SRTP). Additional costs incur for the use of SRTP. You can switch between UDP and TCP. |
Call Center Monitoring | Activate or deactivate call centre monitoring. The use of QueueMetrics is subject to fees. For more information on QueueMetrics, please refer to the „QueueMetrics“ manual on the administration portal. |
Device creation password | This code is important when adding a softphone. An employee the logs in using the “device password” and not the account password. This ensures no changes are made to the telephone system settings. |
Webinterface lock | Specify whether the user name and password are required to access employee telephones (web interface). We recommend activating this option as it greatly improves security. |
Provisioning VLAN | Specify custom VLAN settings for each location. Here you can specify for these VLAN settings to be provided. |
Options for itemised bill | Specifies whether full or abbreviated telephone numbers will be displayed in your itemised bill. |
Port lock | Each desk telephone (snom) has a PC port, theoretically allowing you to connect a PC to the Internet using a LAN cable. Here, you can globally block or enable this PC port for the entire telephone system. |
SIP via TCP | |
Project number length | For external connections, you can record and charge call expenses according to individuals, customers, projects and private expenses using project codes. The project code is entered before external calls are made. It is also recorded under call data. Enter: *9 + project code + telephone number Therefore, please select the length of the project code here, so it is clearly distinguishable and and can be “separated” for outgoing calls. |
Intercom enabled | |
Offline Billing | Calls to special services (e.g. televoting, etc.) are possible. The costs of these calls are billed directly between the external supplier and the customer. To disable the calls, the customer can ask to disable these phone numbers. Please ask your provider. |
CTI mode | |
CCBS/CCNR | Activate the CCBS/CCNR function for your entire telephone system. For more information, click here. |
5.1.3. Direct call emergency numbers
 |
Fieldname | Description |
Emergency number | Selected emergency number(s) are displayed here. |
Add new direct call emergency number | Click on the green button and select emergency numbers from the list. Click on the emergency number and your selection will automatically be added. To save your selection, click on "Save" at the bottom of the page. |
This feature allows you to define emergency numbers.
Once you define emergency numbers, you will no longer need to dial the exit code (e.g. 9 in UK) in front of the emergency number.
Please note the following:
A number selcted as an emergency number can not be used as an extension number in your telephone system. The feature Direct call of emergency numbers will be activated for the selected number.
Example: You define 999 as an emergency number. 999 can not be used as an extension number.
In case a number, which you would like to define as an emergency number is already used as an extension number, the extension number needs to be changed.
5.1.4. User details
User details for Profile
 |
Fieldname | Description |
Email addresse service portal administrator. | |
Password | The minimum password length is 12 characters. The password must contain at least -1 upper-case letter, -1 lower-case letter, -1 number and -1 special character. Allowed characters are: [a-zA-z0-9!"#$%()*+,-./;<@'_]. Special characters like Ä, Ö, Ü, ä, ö, ü are not allowed anymore! |
Password again | Repeat the password. |
Security question | If you forgot the password, you will be able to login by entering a secure answer to your securety question. Enter a new password after this login. |
Security answer | If you forgot the password, you will be able to login by entering a secure answer to your securety question. Enter a new password after this login. |
5.1.5. Call recording
Call recording for Profile
 |
With voice recording activated (subject to charges) you will be able to make basic settings here. I.e., after uploading an announcement to be played before voice recordings, select who should hear this recording and the format in which to e-mailing the voice recording after the recording has been ended (WAV or MP3). After the recording is completed, voice recordings are sent to the respective extension which made the recording. It will be sent to the same e-mail address to which VoiceMail messages are sent.You can add an announcement by clicking the Add-button .
Fieldname | Description |
Enable call recording | Activate call recording. Liable to pay costs. |
Use easy mode | |
Delete messages afterhow many days? | Number of days |
Audio format | Input: mp3 or wav format |
Who is going to be informed in case of call recording? | Input: Select who is informed: - No one - External - Internal - Both After finishing the call, who gets an email with the voice recording. |
File | Select an announcement, this announcement is played before the call is recorded. E.g. "For security reasons, your call is recorded". |
5.1.6. Pilot mode
What is Pilot Mode?
Pilot Mode gives Cloudya Business Premium customers the opportunity to use new features and functionalities before they are officially released. Every feature in Pilot Mode is already fully supported and meant for daily business. Everything during Pilot Mode is free of charge; features you see during Pilot Mode can eventually look and behave differently when/if released.
What is the difference between Pilot Mode and Beta?
Pilot Mode is a self-service opt-in for Cloudya Business Premium customers who want to try out newly developed features before they are ready to be released. In contrast to beta launches, which include very limited support, NFON provides regular support for all pilot features.
How do I activate Pilot Mode?
Pilot Mode is a setting in the admin portal that can be selected at any point in time. There is no additional sign-up or beta agreement required.
Simply log in to your account on the NFON Portal and activate Pilot Mode under Administration > Profile > Pilot Mode.
By flipping the switch, all users will have access to the new features in their apps the next time they log in.
Pilot Mode can also be deactivated at any time. By doing so, users will no longer have access to Pilot Mode features when they login to their apps.
How “final” are the pilot features?
Features in Pilot Mode are meant for daily business. But they are not the final product. They are not part of the service description in any way and therefore there is no guarantee they will be available in the long term. In fact, they are meant to change and improve until they are ready to be deployed as part of a final product. They may never even be part of a final product - depending on our customers’ and partners’ feedback.
Where do I find the documentation?
New features enabled in Pilot Mode are not accompanied by documentation or training. The idea is to unlock these features early and not wait until a manual is written. Providing such documentation in the language of your choice may take longer than making the next change to a feature. Therefore, the features in Pilot Mode come by default without written documentation.
How do I provide feedback?
Feedback regarding features in Pilot Mode can be provided through normal support. Please contact support@nfon.com.
How much does Pilot Mode cost?
There are no charges associated with Pilot Mode. All features can be used by our partners and customers free of charge as long as they are part of Pilot Mode. This does not mean that they will continue to be free of charge when officially released.
Can these features break my system?
No. Features in Pilot Mode are built to not interfere with guaranteed parts of your service. Even if a Pilot Mode feature fails to work, users can carry on as usual with their standard feature set.
What features are currently available in Pilot Mode?
The first feature available in Pilot Mode was the Meet & Share Video Conference itself, in Spring 2022.
Between February and May 2023 reactions were available in Pilot Mode when using the Meet & Share Video Conferencing feature.
What is next?
Our next Pilot Mode feature will be Presence for Cloudya. It will enable line status synchronisation between Cloudya and MS Teams – for automated availability status updates between apps and improved productivity. More to come soon!
5.1.7. Presence synchronisation
To synchronise presence (line state) with MS Teams, it is necessary to activate presence synchronisation between Cloudya and MS Teams. It must be done by an admin who has access to the company Microsoft Admin Centre. To do so, it is necessary to create a sync user account and activate MS Teams synchronisation in the Administration portal.
Creating a sync user account in Microsoft tenant
Create a special sync user in the Microsoft tenant.
Use the credentials of the sync user to log in the Microsoft account.
Complete the account setup (e.g., answer questions, confirm user information etc.).
Tip
We recommend naming the user "Presence Sync" and setting the username to "presence-sync@<your-domain-name>.com" to make it easier to identify the account. You don’t need to assign any licences to this user. The account is only used for reading the presence status of all the other users in the company.
Important
Make sure the sync user account is created prior to continuing with the next step.
Activating presence synchronisation from the Administration portal
Log into the Administration portal.
Select Profile under Administration.
In the Customer section, find the MS Teams Presence synchronisation checkbox.
Tick the box.
⇒You will be redirected to a separate window to perform 3 steps required to complete the synchronisation between Cloudya and MS Teams.
Click the Give admin consent button.
⇒You will be redirected to the Microsoft Admin Center where you will be prompted to enter your administrator email address.
Review the permissions requested.
Accept the permissions.
Click on the Log in as sync user button.
Log in using your sync user credentials.
Click on the Activate NFON MS Teams Synchronisation button to complete the activation wizard.
Important
Make sure that the email address in the Administration portal, under the voicemail address, is the same as the email address assigned to the MS tenant. Furthermore, the MS Teams username should be assigned to only one extension. If the same email address is assigned to multiple extensions, only one extension, picked randomly, will be synchronised.
Important
Please note that the onboarding process is valid for up to 600 users. It will need to be repeated for every 600 users.
The video below describes how to proceed in detail:
Activating presence integration between Cloudya and MS Teams
5.2. Sites
Click the navigation item "Administration". Select one of the following items:
Profile
Sites
Batch Import/Export
Phonebook
 |
Sites

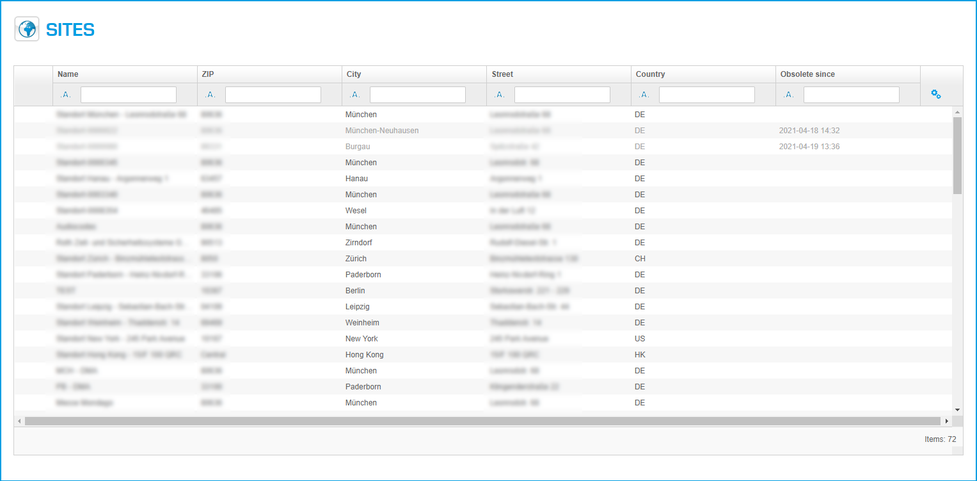
Click on the navigation tab "Administration" and on "Sites.
All sites are listed in the "Sites" section.
 |
A new window with "Sites" is shown:
Sections | Pictures | |
Site information |
| |
Geographical settings |
| |
SIP |
| |
Network |
| |
Monitoring |
| |
Codec profile |
| |
uaCSTA |
|







5.2.1. Site location
Site location information in Sites
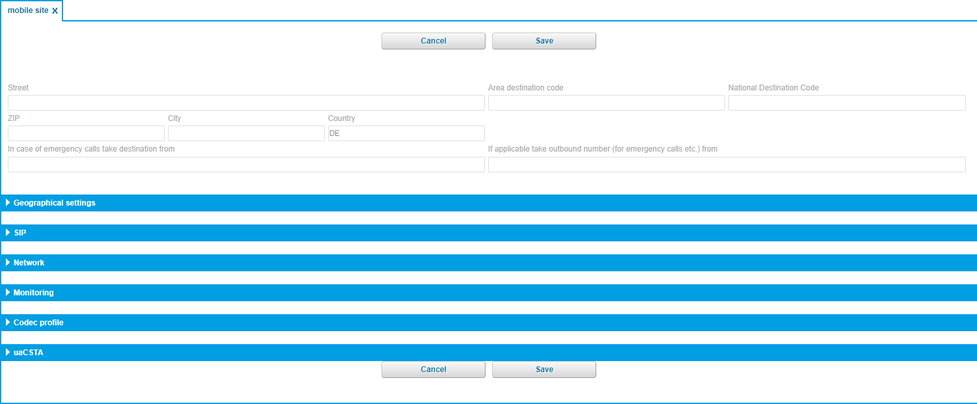 |
Fieldname | Description |
Street | Enter your street. |
Area destination code | Enter the area destination code. |
National destination code | Enter your national destination code. |
ZIP | Enter your ZIP code. |
City | Enter the city name. |
Country | Enter your country. |
In case of emergency calls take destination from | Enter a destination number for emergency calls. |
If applicable take outbound number (for emergency calls etc.) from | Enter a number to take outbound calls from. |
5.2.2. Geographical settings
Geographical settings for Sites
 |
Fieldname | Description |
Dial prefix | Enter your dial prefix. |
Language | Choose your language. |
FMC Number Set | Define the FMC number set for this site. Here you can enter a country specific FMC number set. It saves costs, when you use FMC in the selected country, e.g. Call Back functions. |
Time zone | Here you can define your time zone. Select the area and the location. |
5.2.3. SIP
SIP definitions for Sites
 |
For information and/or changes, please contact your provider.
Fieldname | Description |
SIP transport protocol | This setting will be inherited from the customer profile. |
CANREINVITE | Voice traffic /RTP remain within the company network. |
NAT | Set by special administrator. |
5.2.4. Network settings
Network information for Sites
 |
Fieldname | Description |
VLAN tagging | |
Voice VLAN | |
Data VLAN | |
Port speed | Input : Auto-Sensing or 100M Full |
NTP Server | |
Automatic HotDesking | Set automatic Hotdesking for this Site? |
5.2.5. Monitoring
Monitoring for Sites
 |
Fieldname | Description |
Server | |
Level | Off, Minimal, Moderate, Detailed. |
Until | Date |
5.2.6. Codec profile
Codec profile for Sites
 |
FIeldname | Description |
Codec profil | Standard-Codec (G711) or HD-Codec (G722, Fallback=G711). |
5.2.7. uaCSTA
uaCSTA definitions for Sites
 |
Fieldname | Description |
Active | |
Server | |
Port | |
Protocol | |
Password |
5.3. Batch import/export
On the administration portal click the navigation item "Administration" and then select "Batch import".
 |
Batch import
Fieldname | Description |
Type to create | Type of import: - Phonebook - Phone extensions - Speed dial - eFax extensions |
Replace all existing entries | You have already imported a file and you wish to import a new file of the same type, use this option to specify for all previous entries to be overwritten. When this option is not selected, the existing entries will not be erased and the new file import will insert entries. |
File | Please click on “Find". Now, you can search your drive for a csv file and select a file. Note: To know precisely what a csv file needs to look like, we created a respective template for you per type, which you can find in the download section on the administration portal. This shows you the exact format required for each type. Be aware, that all import fields CAN NOT EXCEED the maximum length! E.G. DisplayName greather then 50 chars. |
Batch export
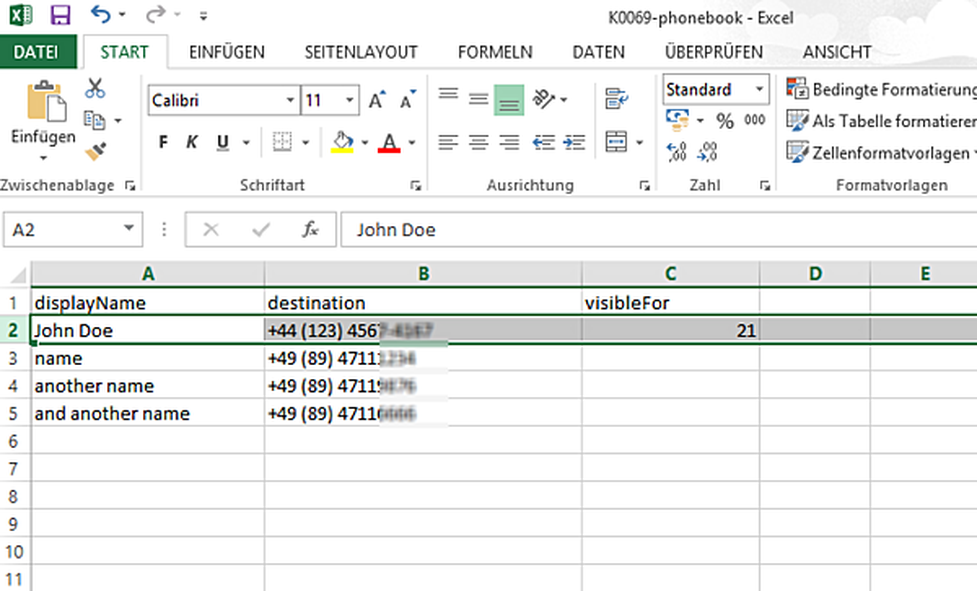
Example of a phonebook export/import Excel-file:
Fieldname | Description |
Type to create | Export-type: - Phonebook - Phone extensions - Speed dial - eFax extensions |
Export format | You can choose between two export formats: - .csv (Comma separated values, UTF-8) - .xls (Excel 97-2007) |
 |
5.4. Phone book
In the administration portal click the navigation item "Administration". Now you can select:
Profile
Sites
Batch Import
Phonebook
Phonebook

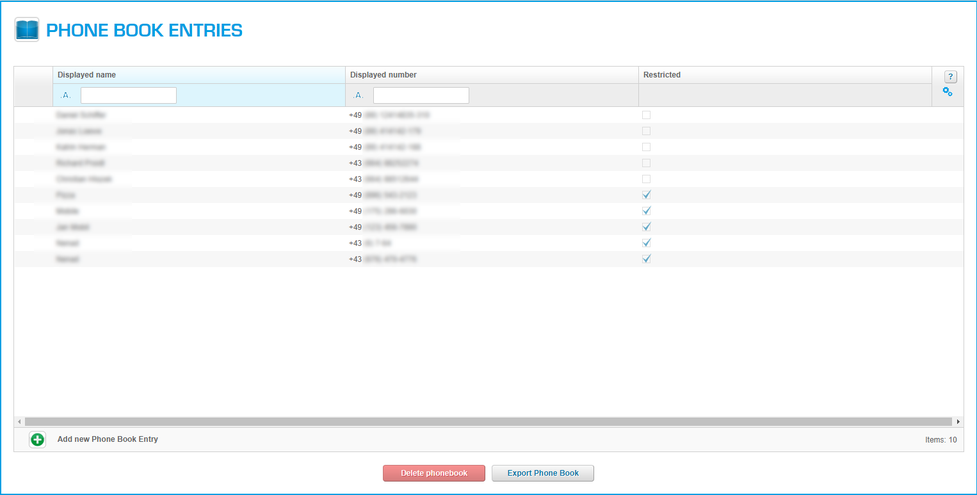
In the administration portal click on the navigation item "Phonebook". On the main window (List) you can add a new phone book entry by clicking the button. It is also possible to change an existing phone book entry (double click).
 |
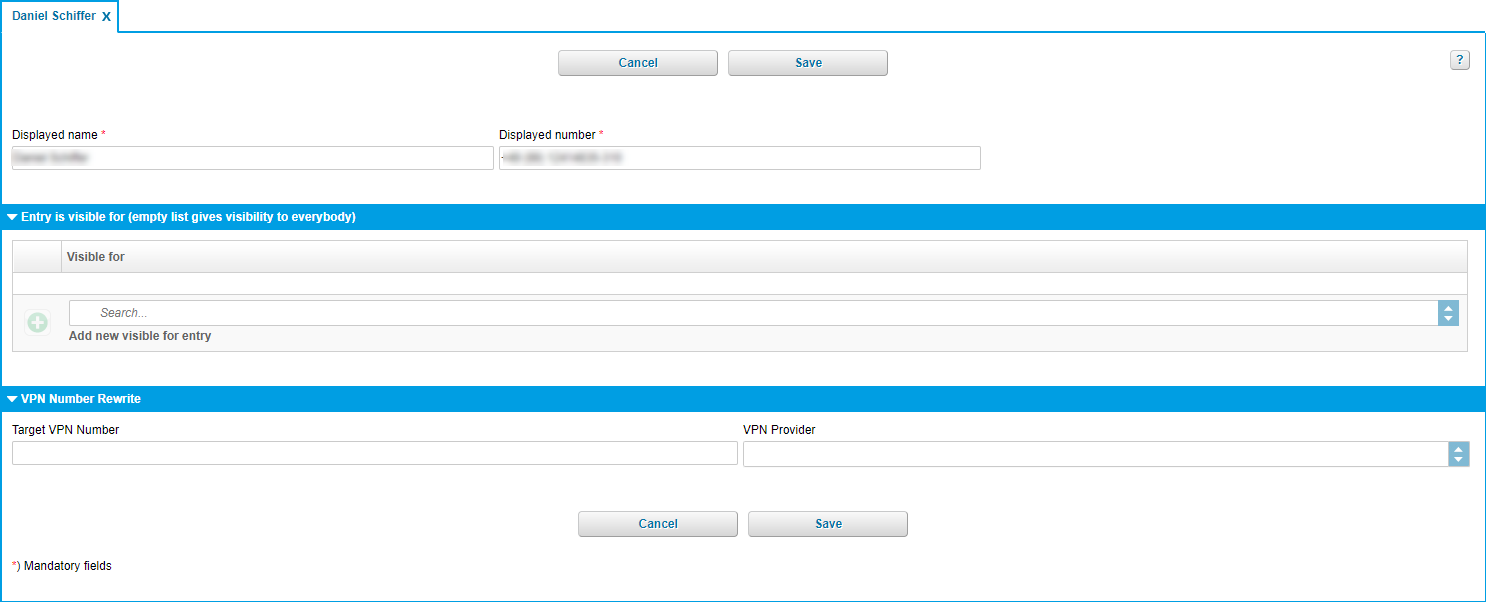
A new window with "New phone book entry" is shown:
Sections | Pictures | |
New phone book entry |
|
5.4.1. Phone book entry
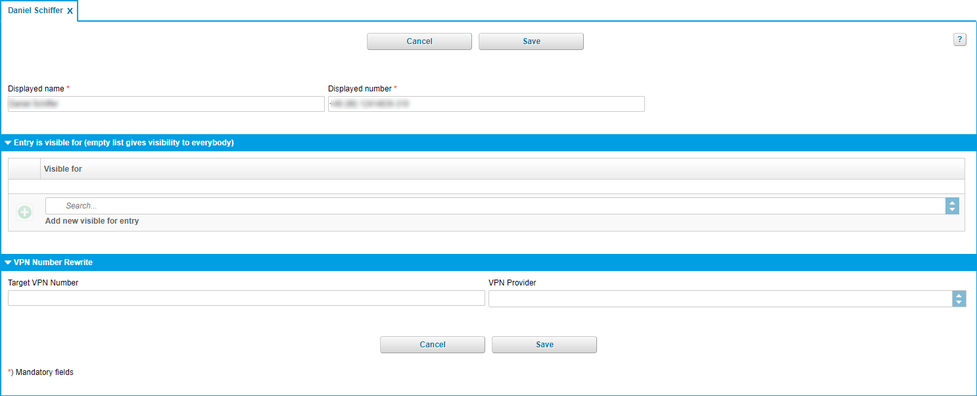
Configuration for phone book entry
 |
*1 for more information consult the O2-VPN leaflet
Fieldname | Description |
Displayed name | Name for your phone book entry (For example: John Doe). |
Displayed number | Enter the respective telephone number to your phone book entry. |
Entry is visibe for (empty list gives visibility to everybody) | Specify whether the phone book entry should be visible to all or only specific extensions. To make the entry only visible to a specific extensions, click on When leaving this list blank, the phone book entry is visible to all extensions. |
Visible for | List of phone book entry that see your telephone number. |
Target VPN number | Enter here your O2 VPN number, e.g. 49800588769123*1. |
VPN Typ | Choose your O2 VPN*1. |

Icons | Function | |
| Add entry | |
| Delete selected entry |

Note
In the event of private use of the telephone system, the employees shall be informed in an appropriate manner about the data processing of private telephone book entries or the individual assignment of favourites / function keys. In various application scenarios, this personal information can be processed within the telephone system use/administration, during technical and operational operation, including troubleshooting or holiday substitution and substitution in case of illness, during the optimisation and during law enforcement scenarios. A distinction between business and private information cannot be made technically, or only to a limited extent.