2. Managing users
2.1 Overview
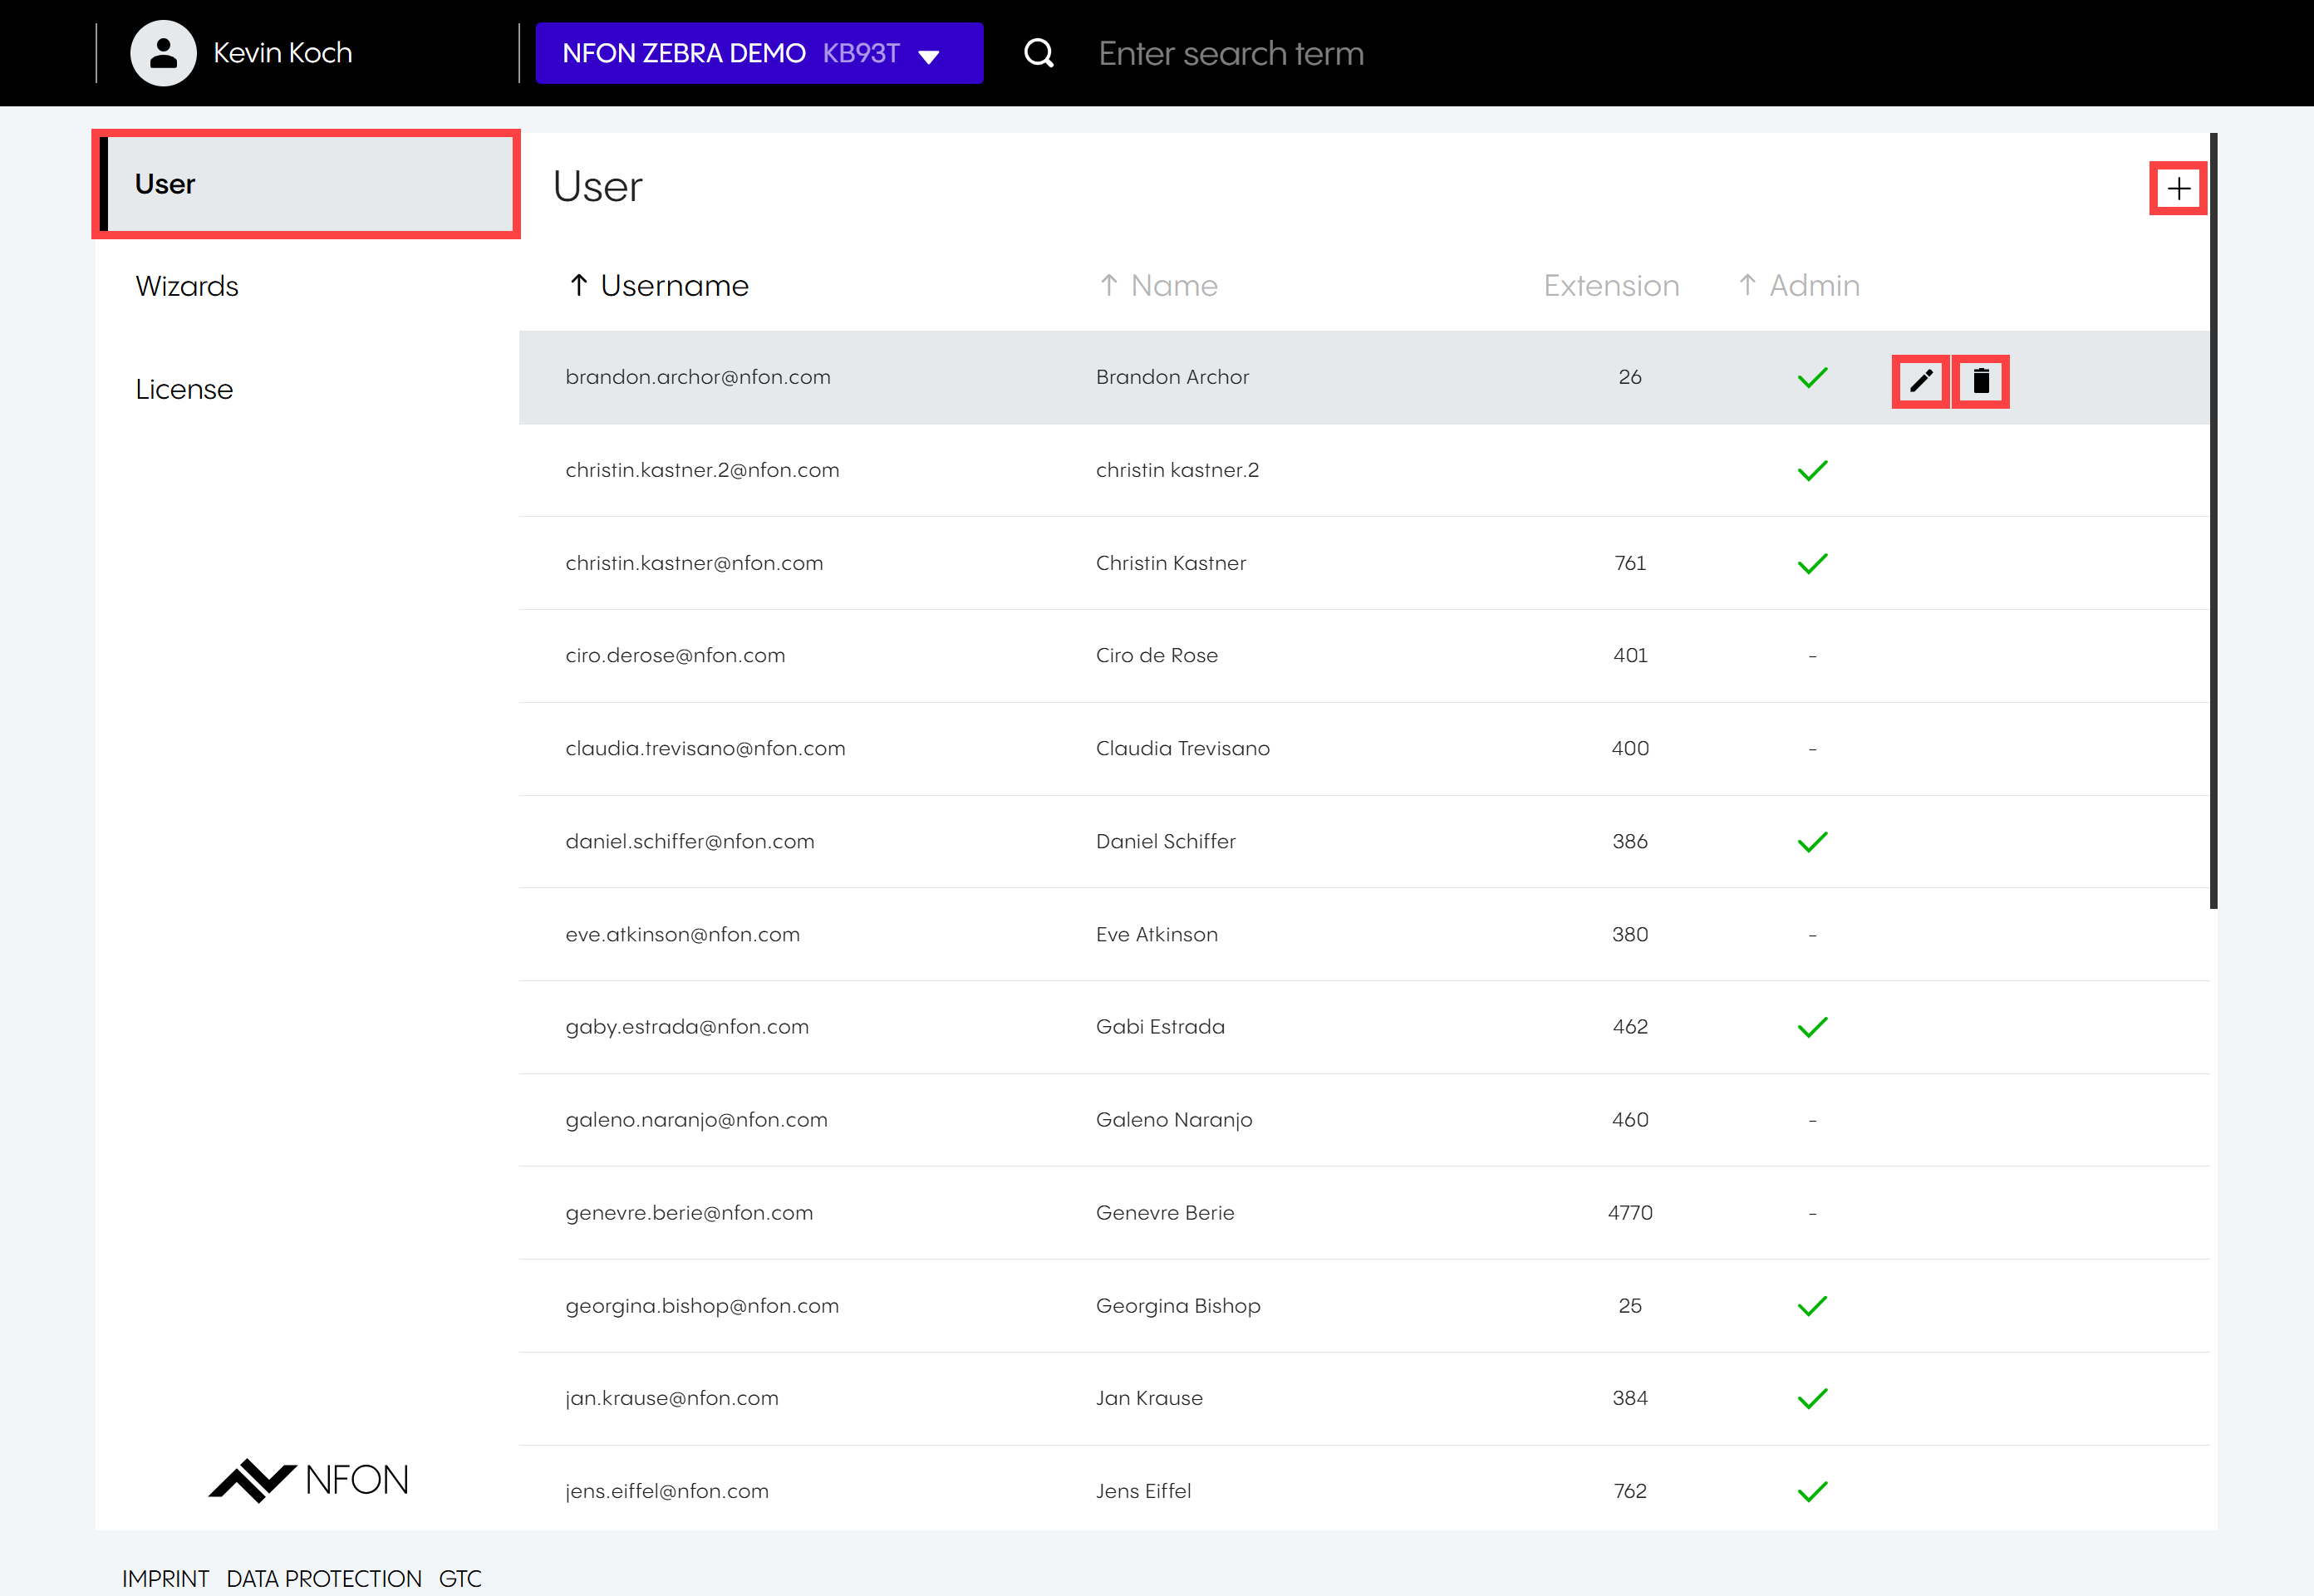
Once in the user management application, you will land in the User tab. In this tab, you can:
See which users have been added and whether they have admin rights
Edit users
Delete users
Create users
2.2 Editing users
To edit users:
Hover your mouse over the user name.
Click Edit (pencil icon)
 .
.⇒ The User Data page opens.
Editing user data
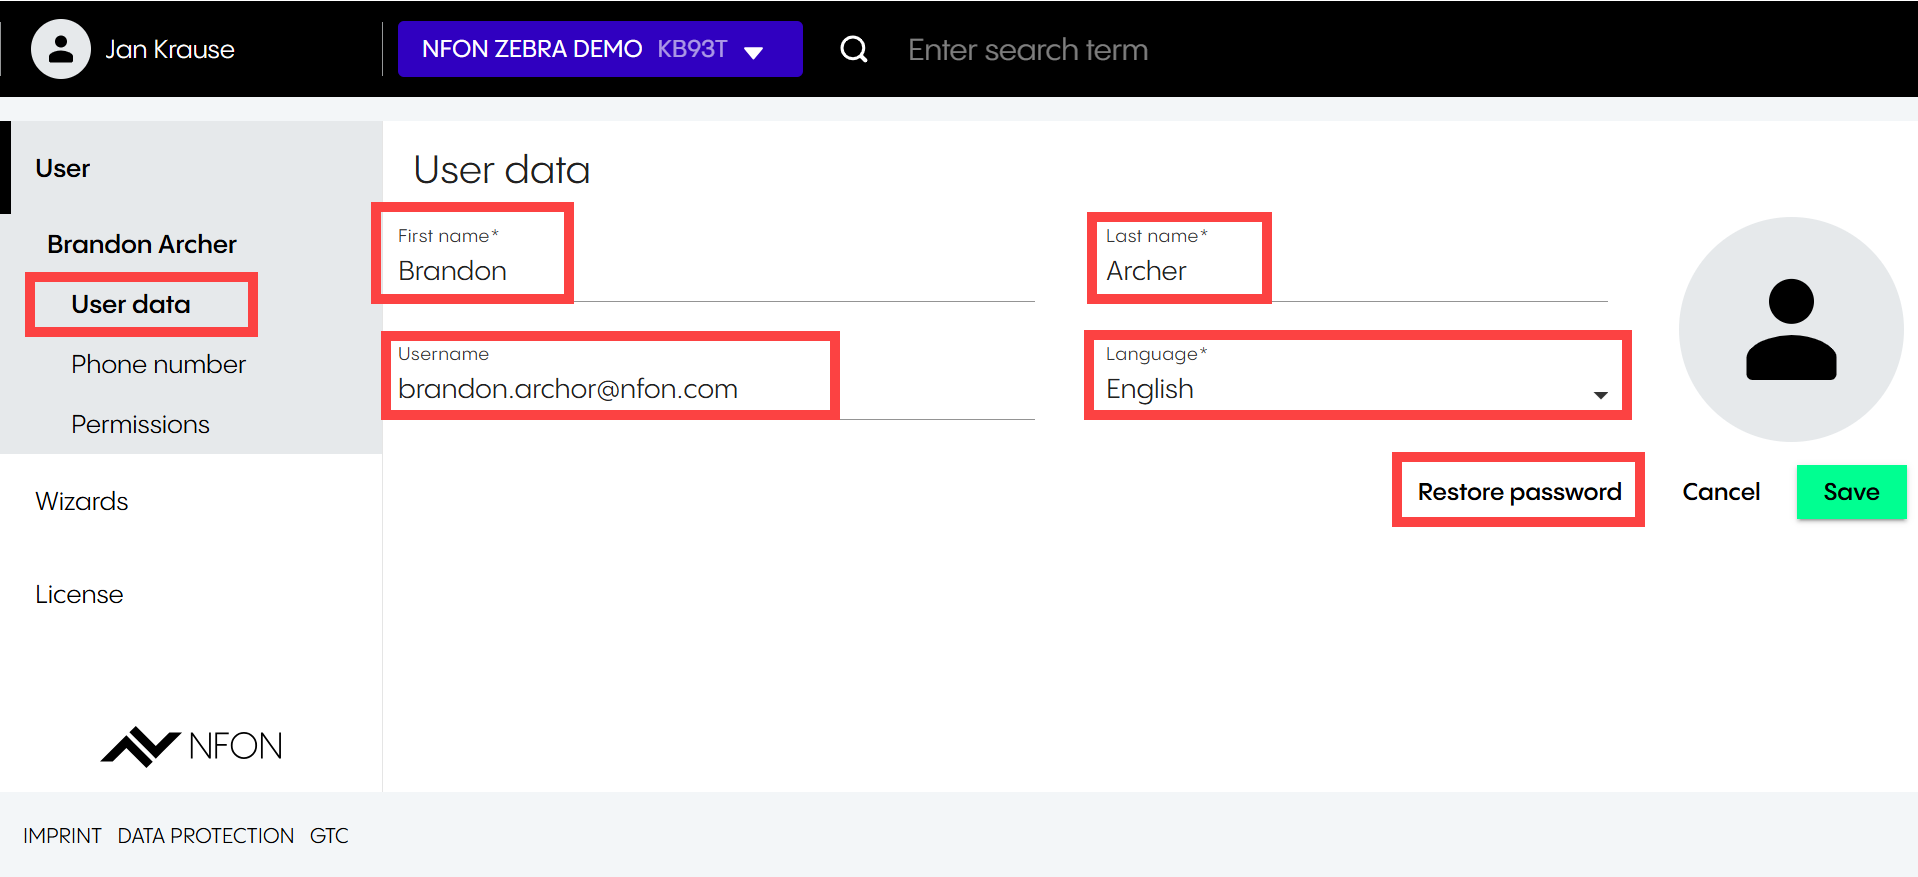
In the User data tab, you can:
Change user first name
Change user last name
Change username
Select a different language from a drop-down menu
Restore user password
Editing phone number
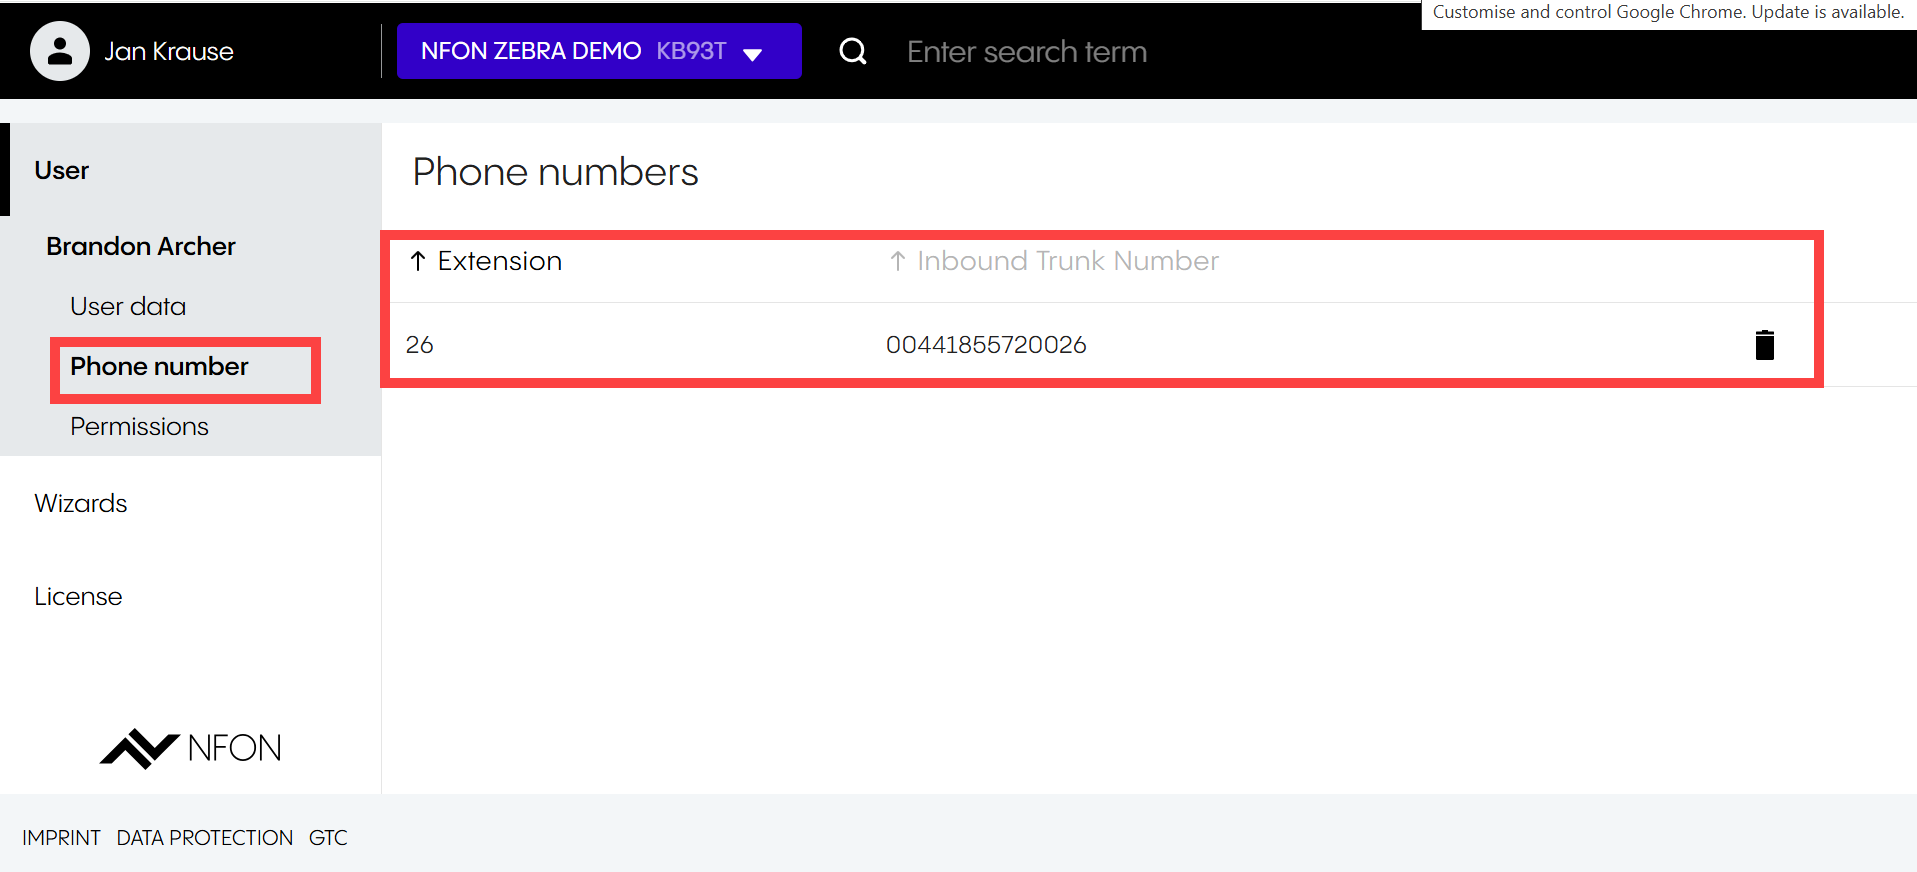
In the Phone number tab, you can:
Remove the extension.
Editing user permissions
To edit user permissions:
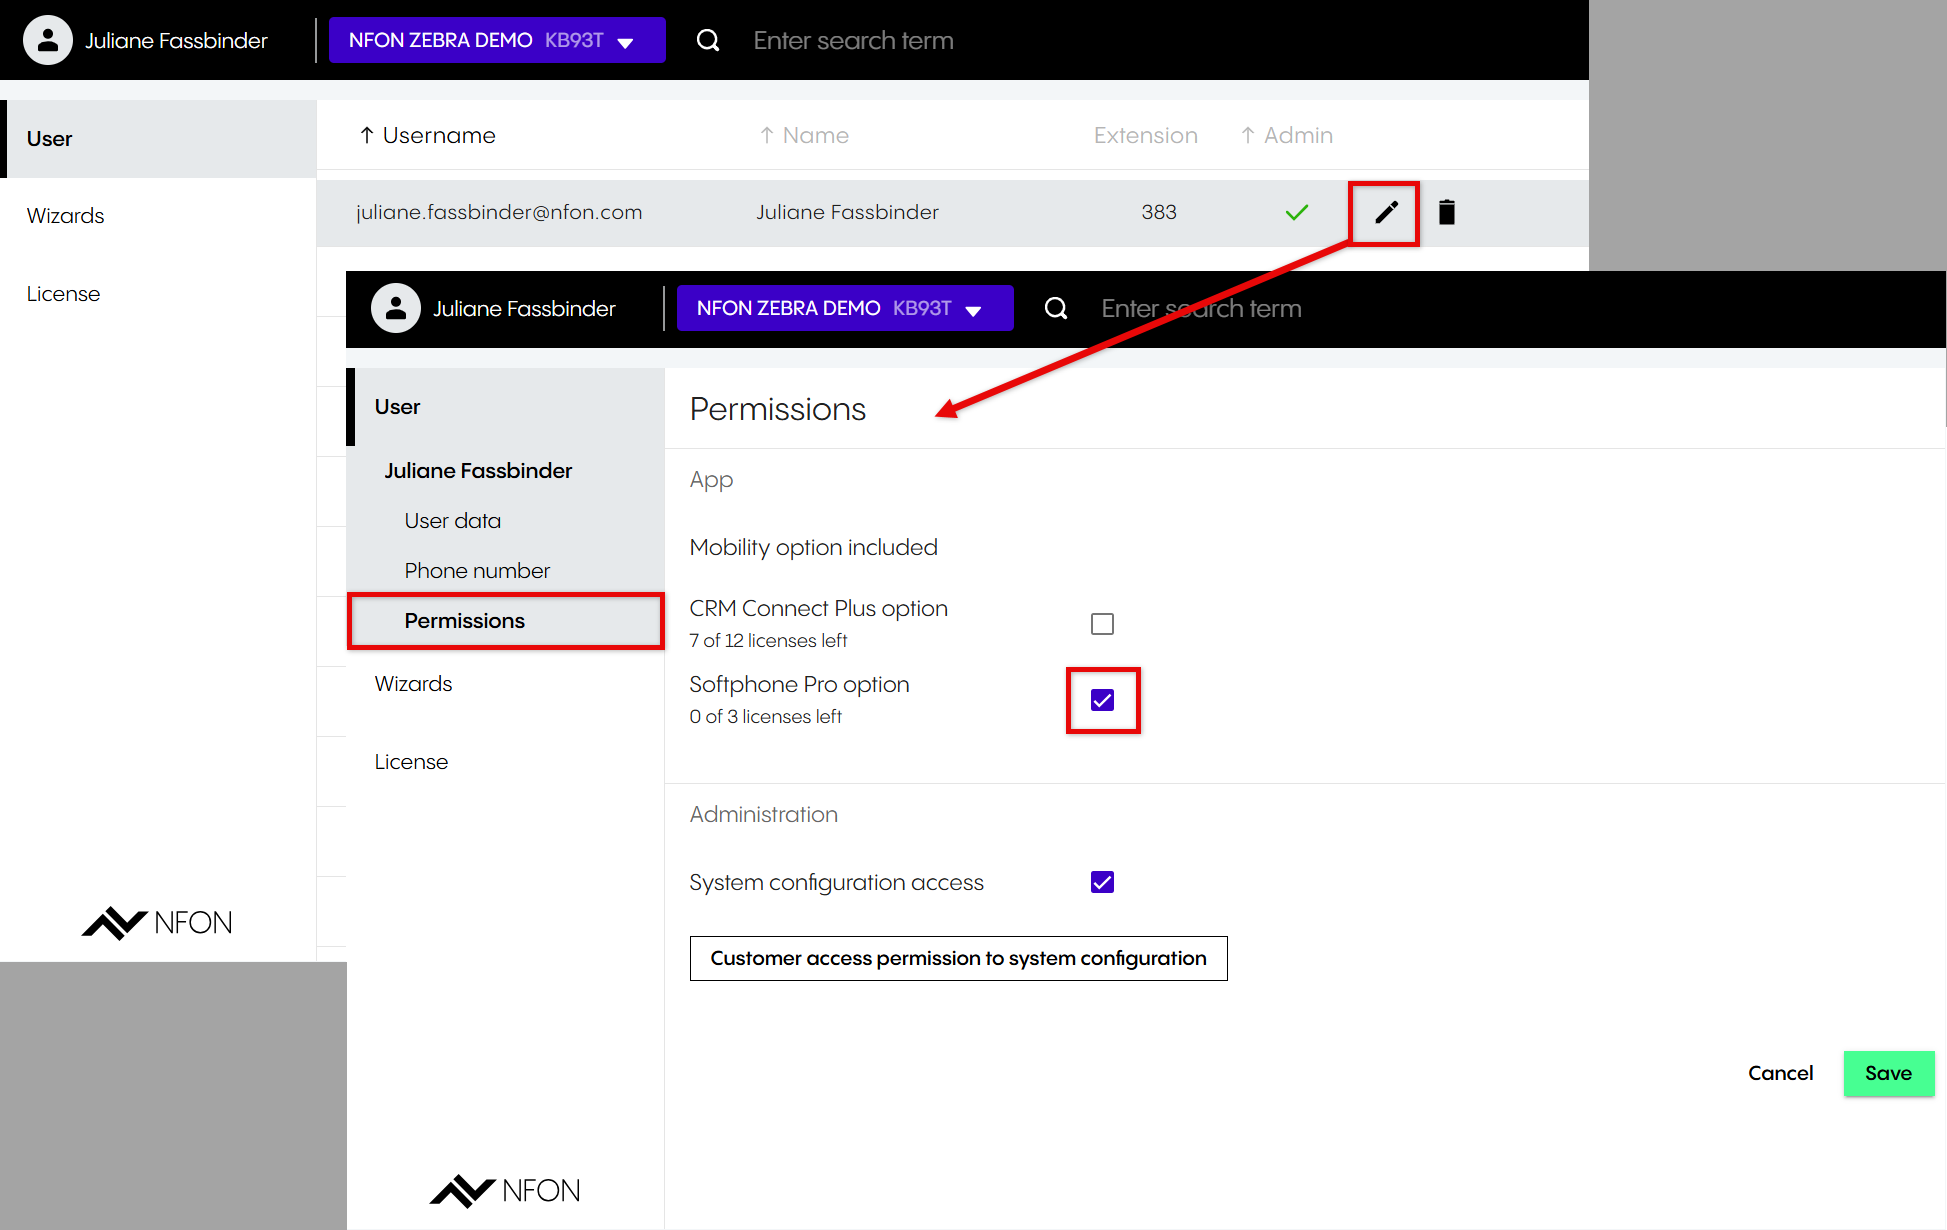
Click Permissions .
⇒ Here you can see all the licenses allocated to this user.
Tick or untick the boxes to assign to or revoke licenses from this user.
Tick on untick the box next to System configuration access to assign to or revoke admin rights from this user
2.3 Creating a user
To create a user:
Click on the plus icon in the upper right-hand corner.
⇒ A new field will open.
Enter the details for the new user.
Tick Admin rights if you want the user to have admin rights.
Click Save.
⇒ A new user has been created. After a quick update, you will see the user in the list.
Note
Please note that after a new user has been created, they will automatically receive an email where they will be able to set their own password.