2. Advanced telephone functions
2.1. Overview
Note
You can use various features of the telephone system via the end device as well as via Ncontrol or the administration portal (also refer to the administration portal manual).
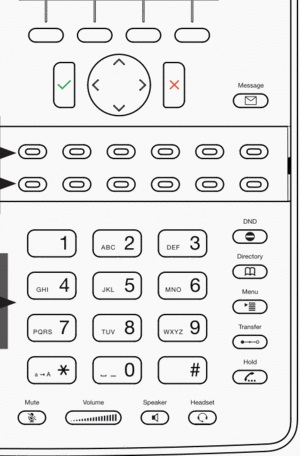
After pressing the "menu" key you have the following options:
Call settings
Call waiting indication: define whether this function should be activated.
(optional, depending on settings on the administration portal) Timeout: set the ringing time.
(optional, depending on settings on the administration portal) Intercom: the intercom function enables speaking directly to a linked extension through the system, without dial tone and ring tone.
Caller ID block: set your entire number to be shown to the party being called, the switchboard number to be displayed or all caller ID information to be blocked.
Call forwarding: activate the function Call forwarding
Parallel call: configure another telephone or your mobile phone to ring in addition to your telephone when a call comes in. You can then answer the call with one of the two telephones.
Call forwarding: profiles
Here you can select your preconfigured call forwarding profiles.
For details, please refer to the Ncontrol manual.
You can edit the default profile directly via your device.
For details, please click here.
Telephone settings
Automatic redialling
Suggests number (if necessary, remove function)
Ring tone
Define as primary device
Logoff
Queues
Queues can be enabled or disabled; for set-up see administration portal manual)
Use the “Toggle key ↑↓”  to mark the desired selection and press the Confirm key
  .
.
Note
The snom 710/D710 does not have a menu key. Access the menu by pressing the the second function key. Refine your call forwarding options via nControl.
2.2. Function keys & codes
The administration portal allows you to program function keys. For more detailed information, please refer to the administration portal manual.
Note:
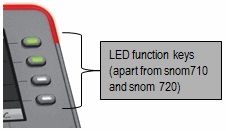
Assigning the 4 keys shown above with LED corresponds to the first 4 assigned function keys configured via the service site. If none of the first four function keys are assigned, they can be used as line keys. I.e. pressing the key will open a new line.
Assignment of the function keys
Standard settings (i.e. no programming): Local Loop
Incoming calls are indicated respectively by the first LED (set to local loop) flashing.
When the call is answered the LED stays lit.
If a second call comes in during this call, the second LED flashes.
By pressing the key next to the flashing LED, the first call is automatically placed on hold and the second call answered.
You can now toggle between the calls by pressing the key next to the flashing or steady lit LED. In this manner, you can make a total of five calls at the same time.
Extension / telephone number
You can add any extension or telephone number to the busy lamp field.
- You can start a call by pressing the respective busy lamp key. If an internal extension is programmed, you can see whether that extension is currently busy:
If the LED next to the key flashes, the party receives a call.
If the LED is consistently lit, the party has answered a call and is currently busy.
If the LED next to the respective key flashes, you can take the call by pressing the respective key next to the flashing LED.
Intercom
You can add any extension in the PBX system and then use this function key to directly communicate with this extension through the intercom. The other party must have the intercom activated on their device. Intercom refers to a conventional intercom system (similar to walkie-talkies) directly connecting you to the other party’s speaker by pressing the assigned function key.
Additional functions via * codes
Entering various codes (as listed on the following page) allows you to additionally program functions such as call transfer to the keys.To do so, simply enter the code with the desired number in the entry field.
Exemple:
Call forwarding to your mobile device number 0171 12345 with the function key 1
Push the Add-symbol.
Select function-key 1.
Enter *110017112345. (*11 for call forward, then 0 or 9 depending on the call number for external calls!).
Then confirm the line with the function-symbol.
Push the Confirm-symbol.
You can set another function key with *11 to deactivate the call forward.
2.3. Telephone lock
You have the option to protect your telephone from improper use by locking its keypad. I.e. with the keypad locked, no outgoing calls can be dialed. However, the keypad lock can be deactivated at any time.
To lock your snom telephone, press and hold the  key for several seconds. A “lock icon” in the display of your snom telephone indicates the telephone is locked.
To deactivate the keypad lock, press and hold the key again for several seconds. By default the keypad lock does require the VoiceMail-PIN.
To cancel the keypad lock entirely, please go to the web interface for your end device, by entering the device's IP adresse in any browser, and enter your personal PIN under Settings  Preferences Keypad Lock.
You can also change and deactivate your PIN there.
To set a PIN for unlocking, please go to the web interface for your end device and enter your personal PIN under:
Settings Preferences Keypad Lock
There, you can also change or deactivate your PIN.